VCS Providers
What are VCS Providers?
Version Control System (VCS) providers are a feature in Tharsis that can establish links between a VCS repository, like GitLab, and your Tharsis workspace. Creating a VCS provider within Tharsis and linking it to your workspace can enhance workflows. For example, runs can be set to automatically trigger in response to commits to a specified branch in a repository.
Additionally, one VCS provider can be linked to multiple workspaces, which is useful in tailoring workflows. For example, a workspace can be set up to respond to Git commits from one directory of a repository while another workspace can be set up to respond to Git commits from another directory only when specified conditions are met (e.g., defined glob patterns), all while using one VCS provider.
VCS Integration
VCS Integration comprises the following two parts:
-
Create and set up your VCS provider within a group
-
Link your VCS provider to a workspace by creating a workspace VCS provider link
Check the FAQ to see if there's already an answer.
Creating and Setting up a VCS Provider
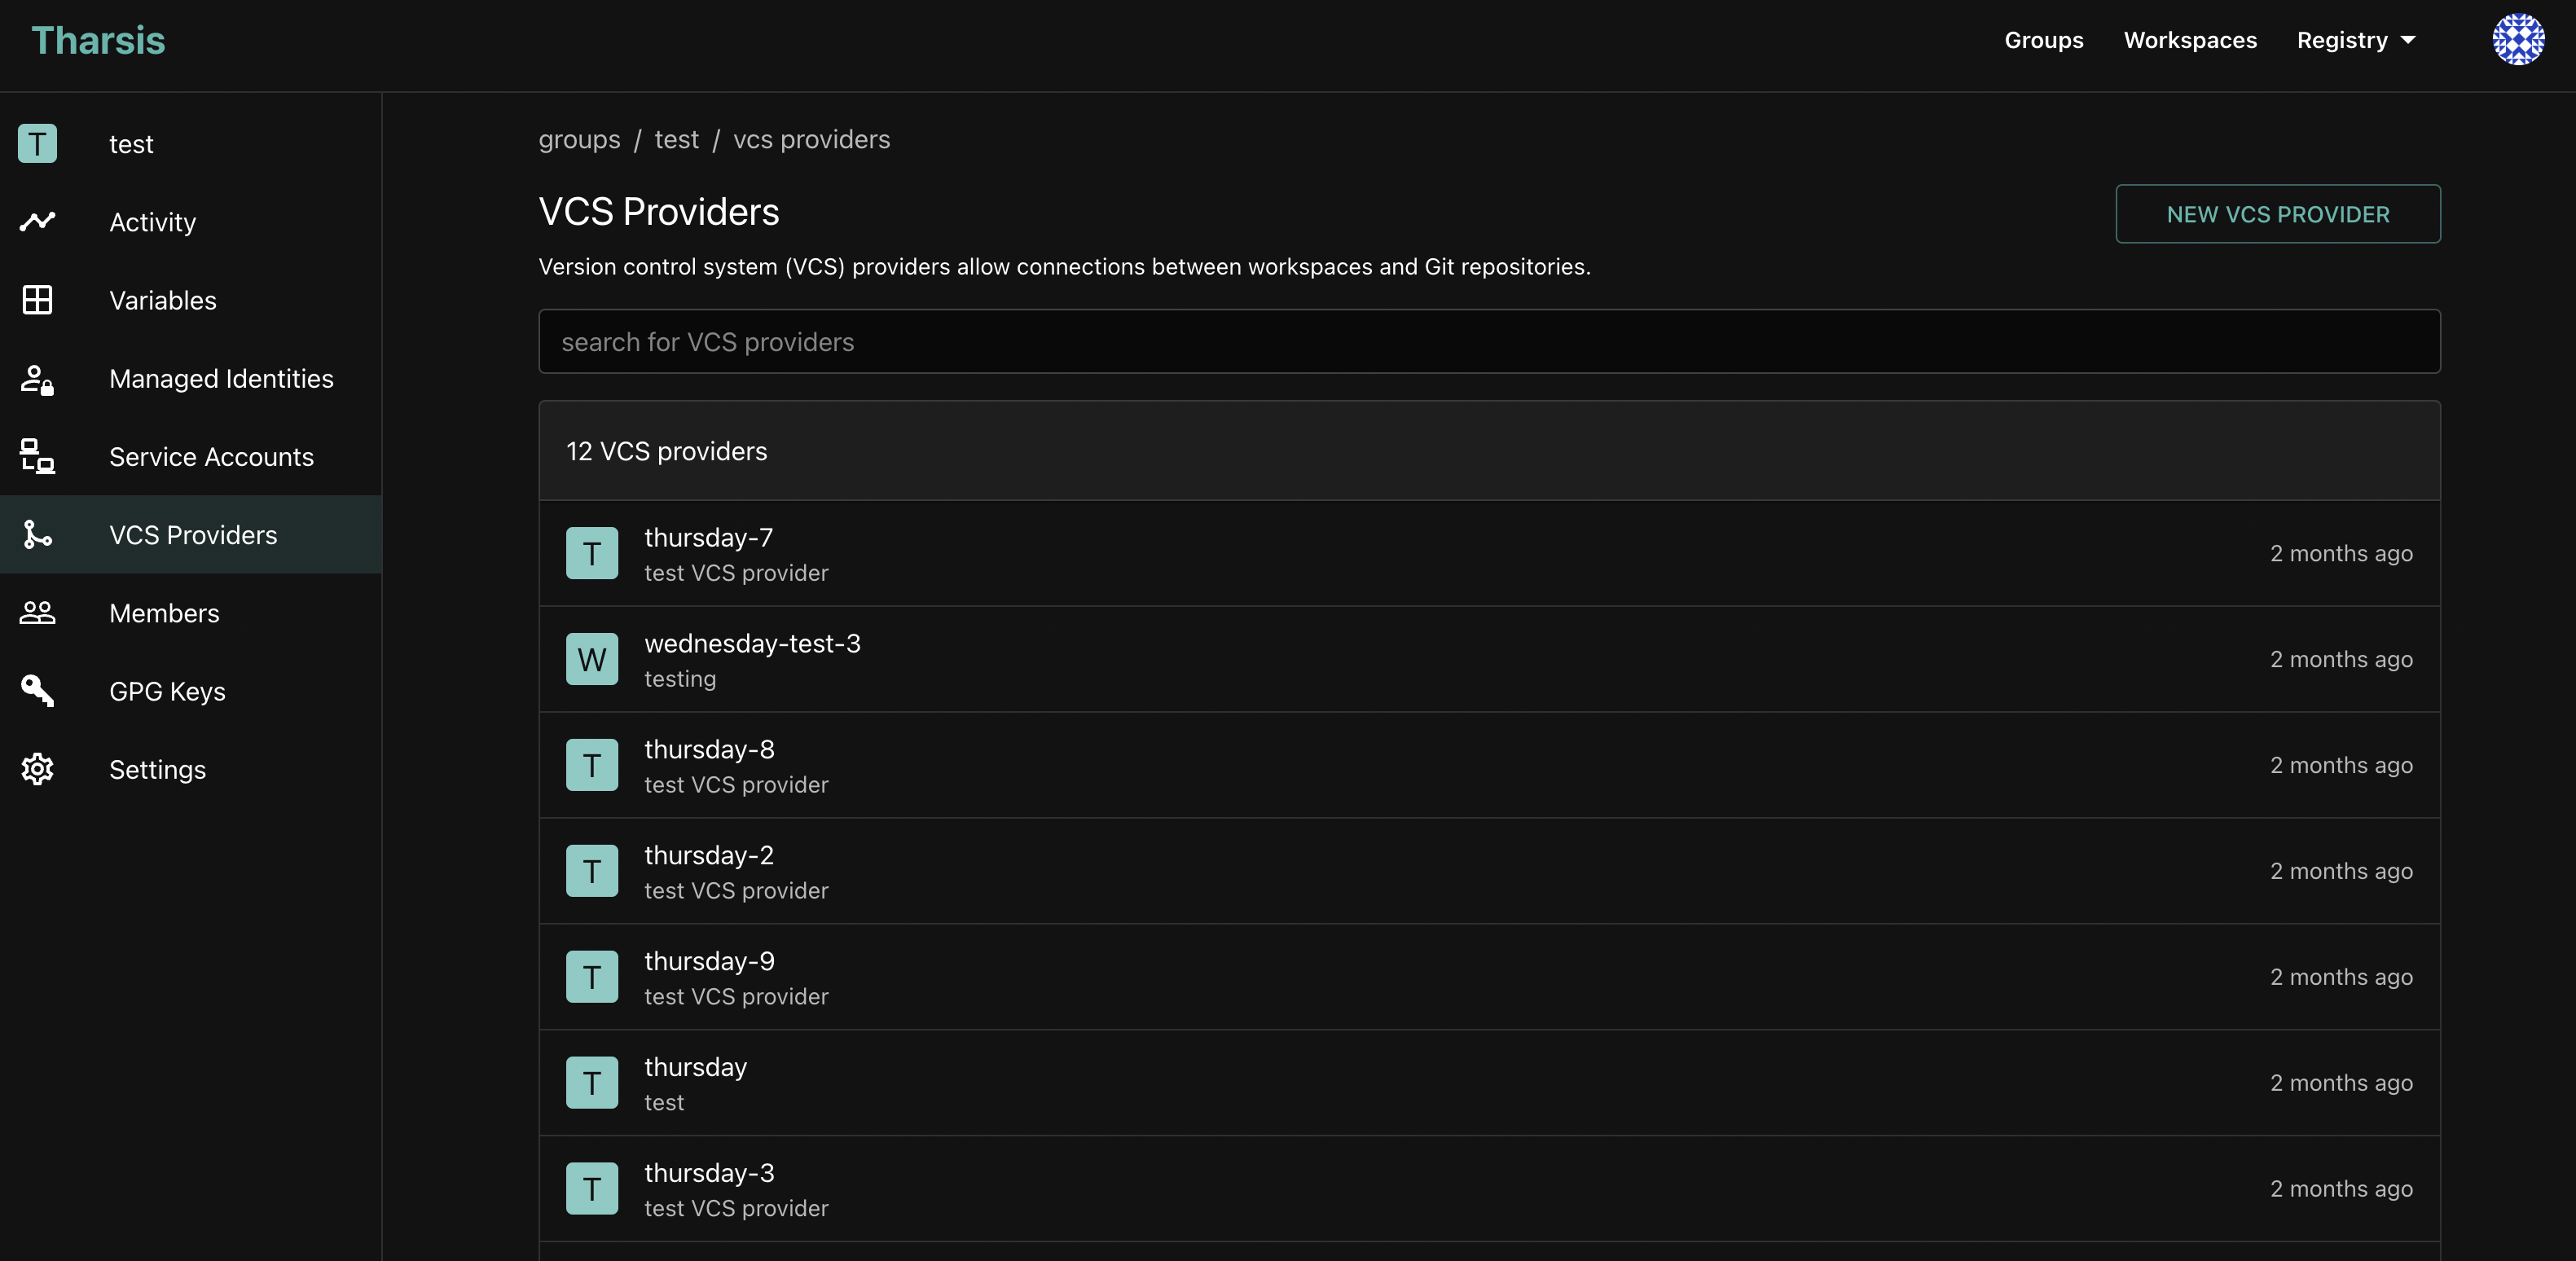
VCS providers are created and managed within Groups. To view the list of VCS providers in a specific group, navigate to the group's page and select VCS Providers from the sidebar. VCS providers that have been created in the group will be listed. A search bar is available to find providers by name.
Once a VCS provider is created in a Tharsis group, it is inherited by all its child groups.
-
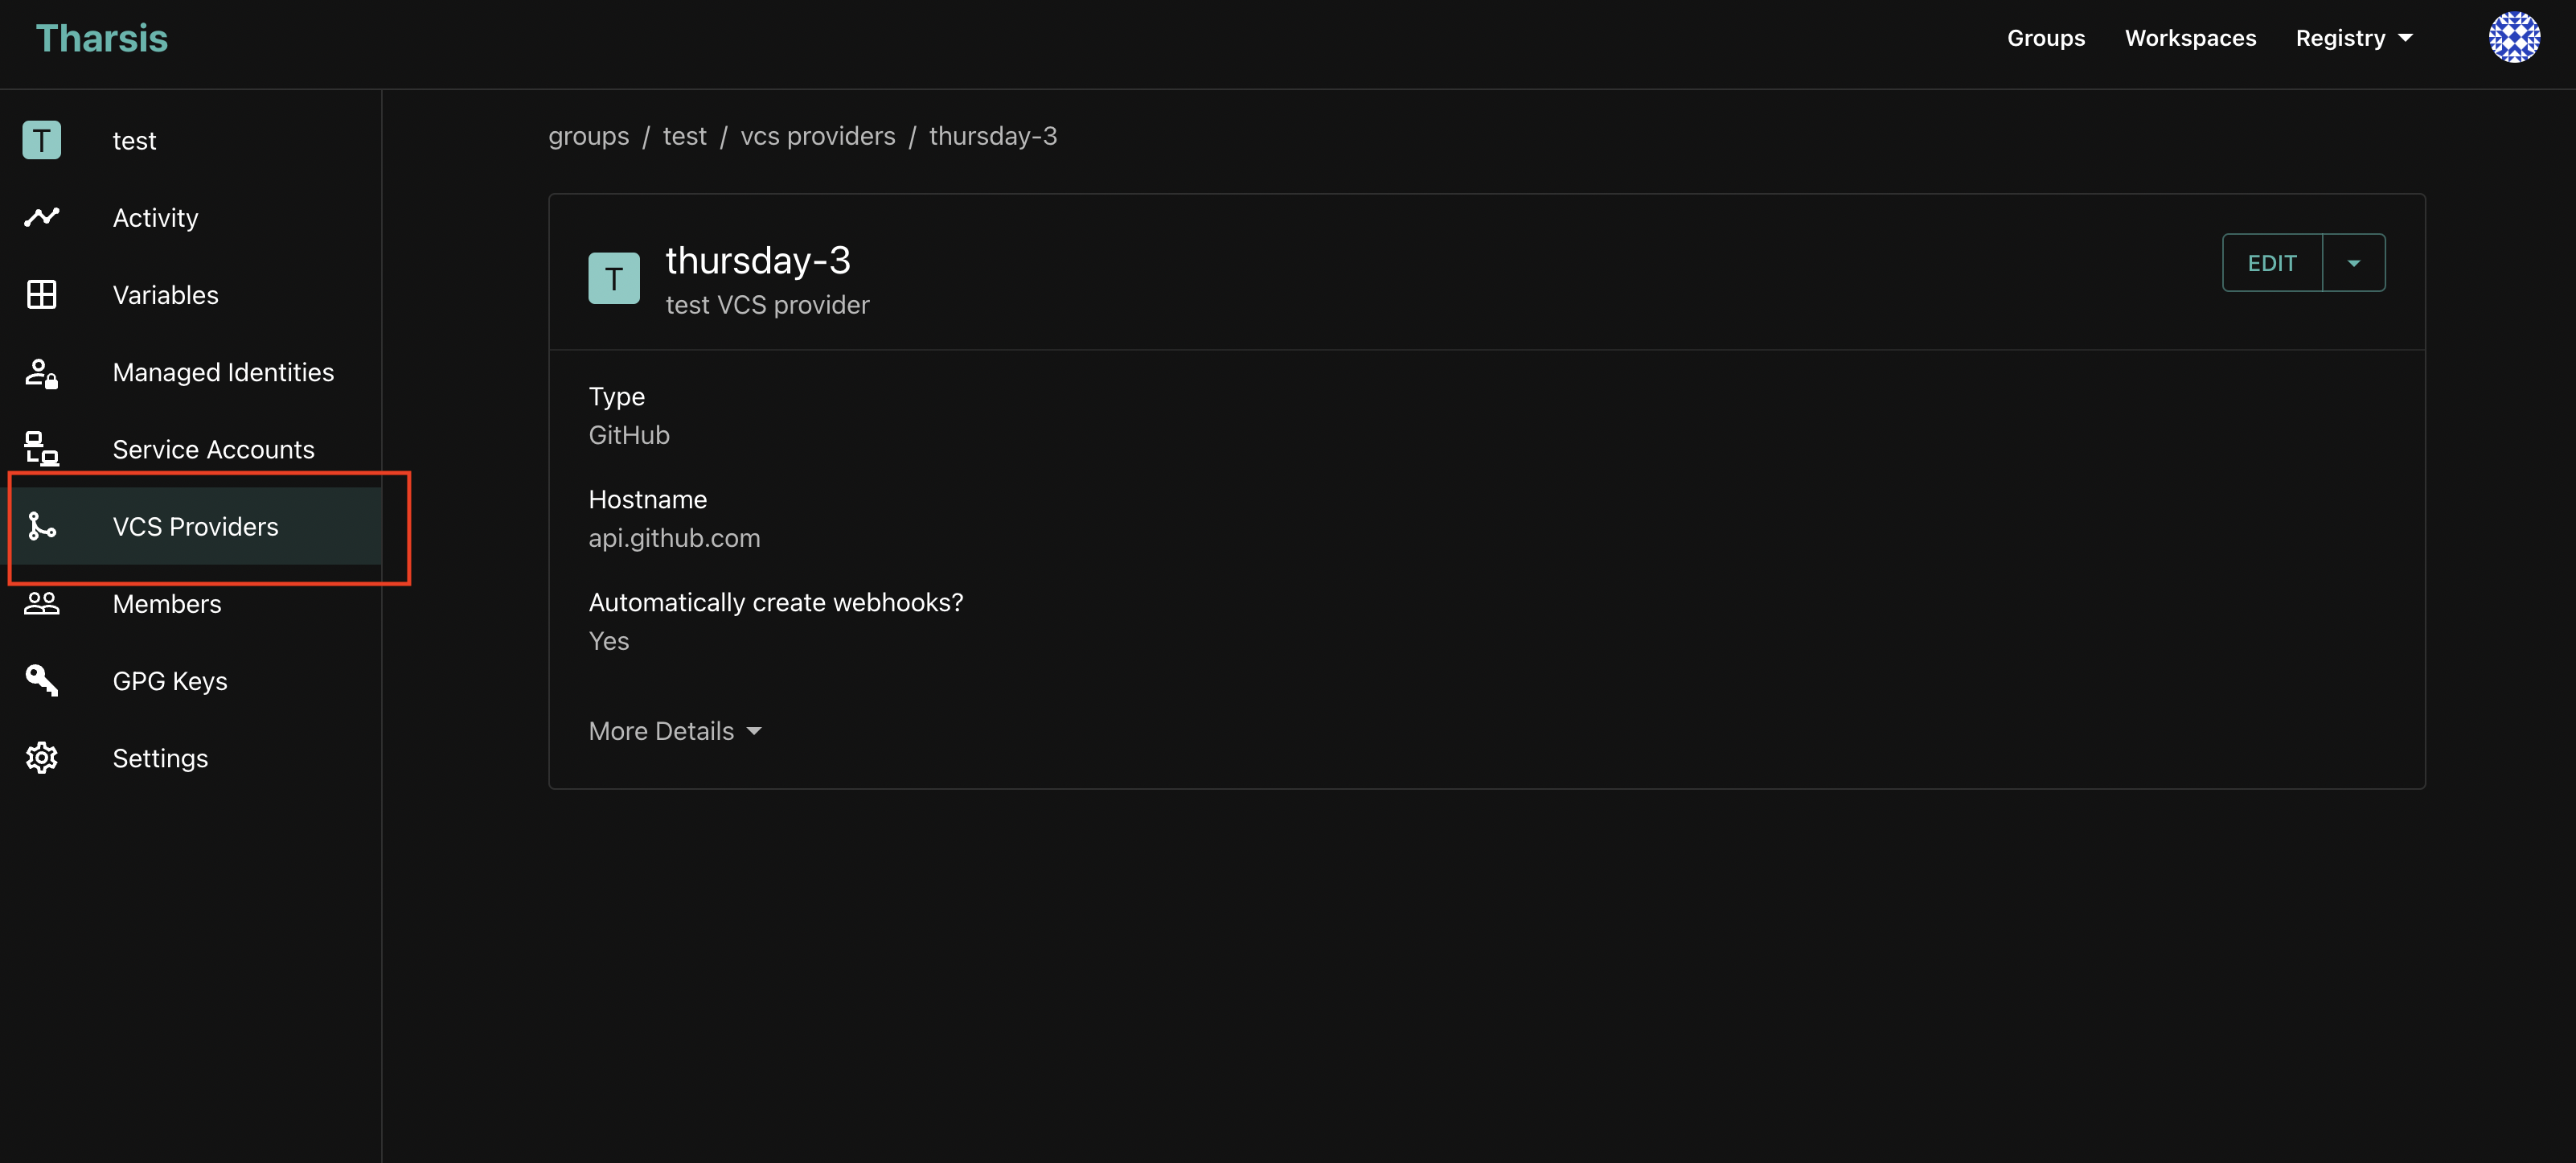
Select a VCS provider to be navigated to the provider's detail page. On this page, there are several options for updating your provider (discussed later in Update a VCS Provider.)
Create a VCS Provider
-
Navigate to the group page where the VCS provider will be created and select
VCS Providersfrom the sidebar. Then click onNEW VCS PROVIDER(center of the page if the group has no providers and at the top right if the group has providers).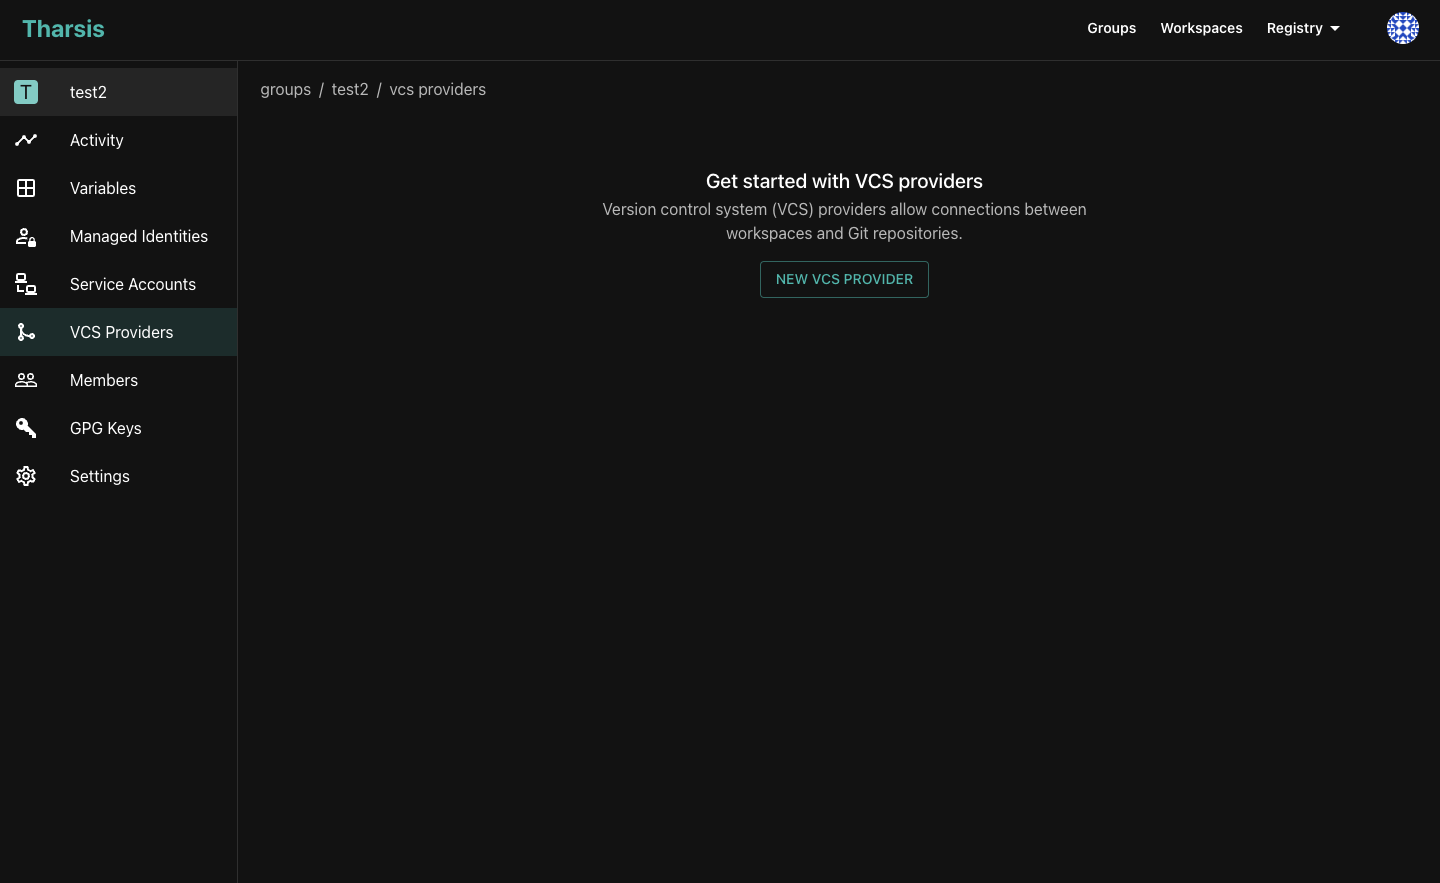
New VCS Provider Form
-
Select a VCS provider type. Currently, Tharsis supports GitHub and GitLab.
-
Enter a unique name for the provider. Also, you may include a description (optional).
-
Enter an API URL (optional). If no API URL is entered, Tharsis will use the provider type's publicly available API URL.
noteA VCS provider's API URL is sometimes different from the primary URL. For example, GitHub uses
https://api.github.comwhich is different fromhttps://github.com.
Automatically create webhooks?
-
By default, Tharsis will automatically create webhooks. You may change this to
No. If you selectNo, you can manually configure webhooks within the settings of your specified repository later when you are creating your workspace VCS provider link (discussed later in Manually Configuring Webhooks).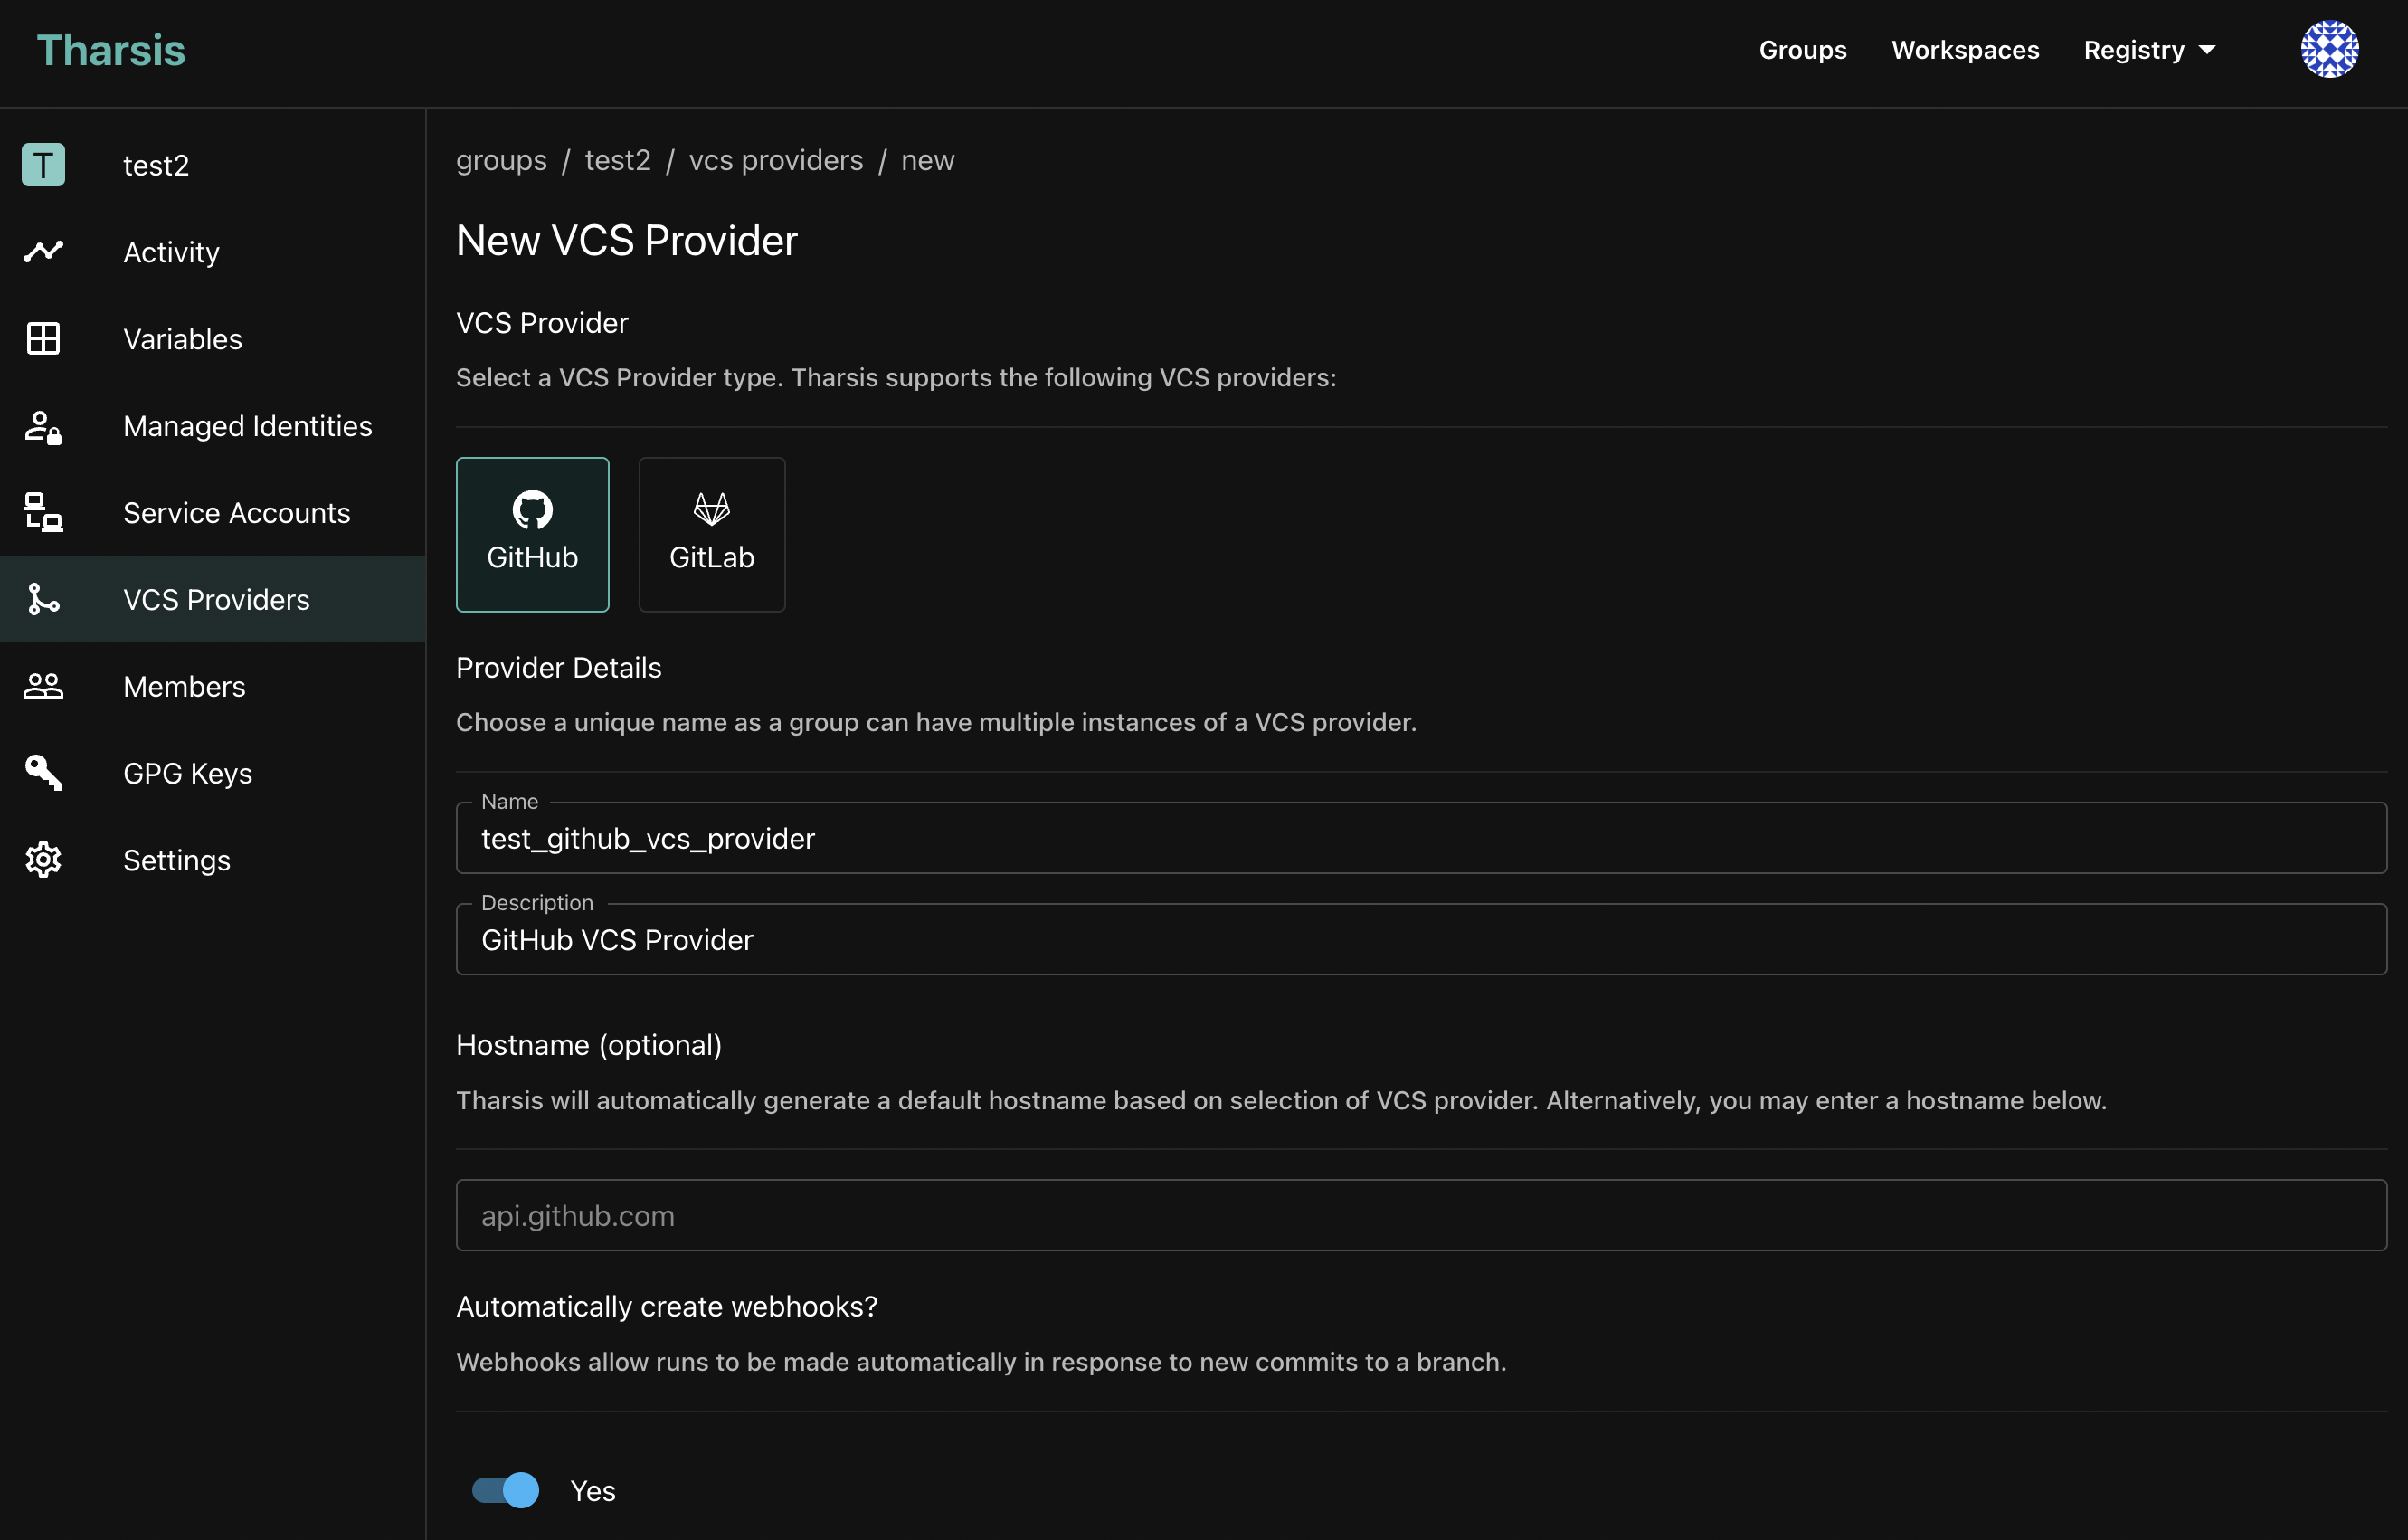 did you know...
Webhooks are a mechanism to automatically trigger actions in response to specific events. In Tharsis, when webhooks are enabled, runs can be triggered when Git commits are pushed to a specified repository. You will be able to further configure webhooks in your workspace when you set up a workspace VCS provider link.
Also...If you wish to manually configure webhooks, then set Automatically create webhooks to
No. Doing so gives you more control over how repositories can be accessed. For example, GitLab allows the usage of read-only scopes, which may be important if giving write access is not ideal. However, GitHub, as of yet, does not seem to support read-only scopes for OAuth applications.cautionOnce a VCS provider is created, the API URL and automatic creation of webhooks setting cannot be changed.
Creating an OAuth Application
-
In a separate window, go to your host provider and start the process to create an OAuth application.
-
GitLab
- Use the copy icon to copy the redirect URI. This value is required when creating the OAuth application.

-
If you selected
Yesto automatically create webhooks, enable theConfidentialsetting. Also, enable the following two scopes:- api
- read_repository
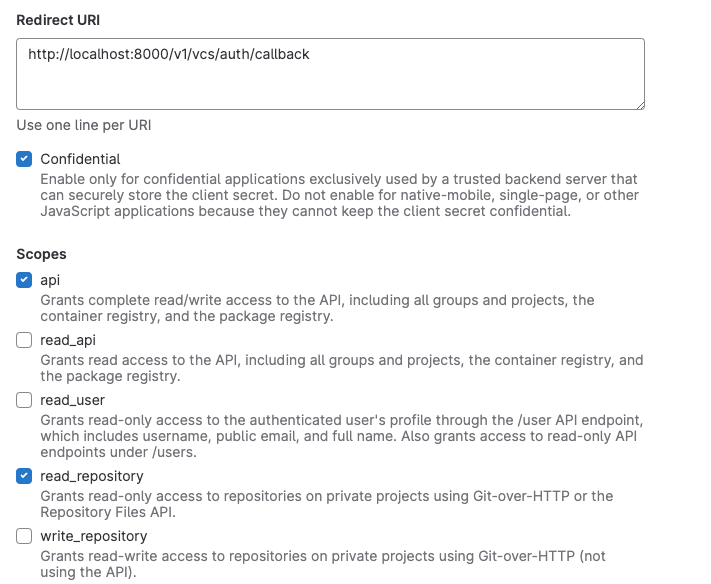
-
If you selected
No, enable theConfidentialsetting and the following two scopes:- read_api
- read_user
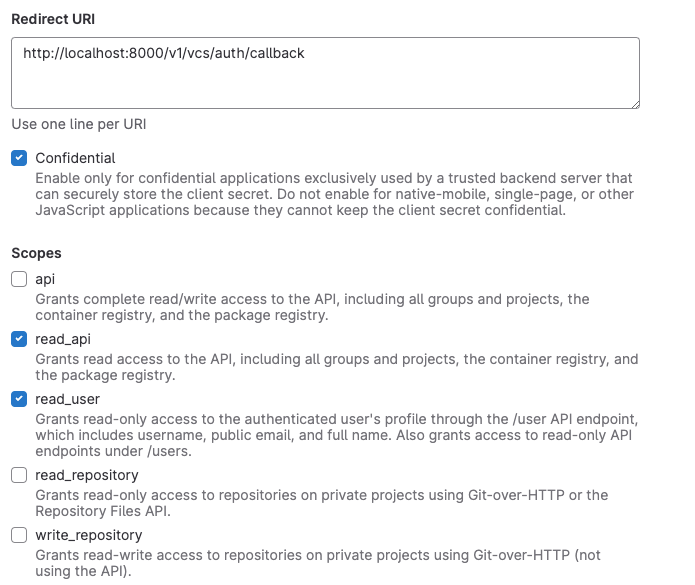
-
GitHub
-
Use the copy icon to copy the callback URL. This value is required when creating the OAuth application.
-
GitHub requires a homepage URL. The UI provides a URL, but you may use a different one as the homepage URL will not affect completing the OAuth flow.
-
There are no permissions that must be initially configured when creating an OAuth application via GitHub.

-
-
-
When you have created the OAuth application, you will be provided with an ID and a secret value. Copy and paste these values into the ID and secret fields on the New VCS Provider form.

-
Click on
CREATE VCS PROVIDER. If creation is successful, Tharsis will immediately generate a new authorization URL and redirect the browser to an approval page where you must authorize your newly created VCS provider to use your OAuth application.
-
After you authorize the application, a page will be generated confirming that your newly created VCS provider was successfully authenticated with Tharsis.

Update a VCS Provider
-
Navigate to the group page with the VCS provider to update and select
VCS Providersfrom the sidebar. Click on a VCS provider to be navigated to the provider's detail page. On the detail page, there are several updating options.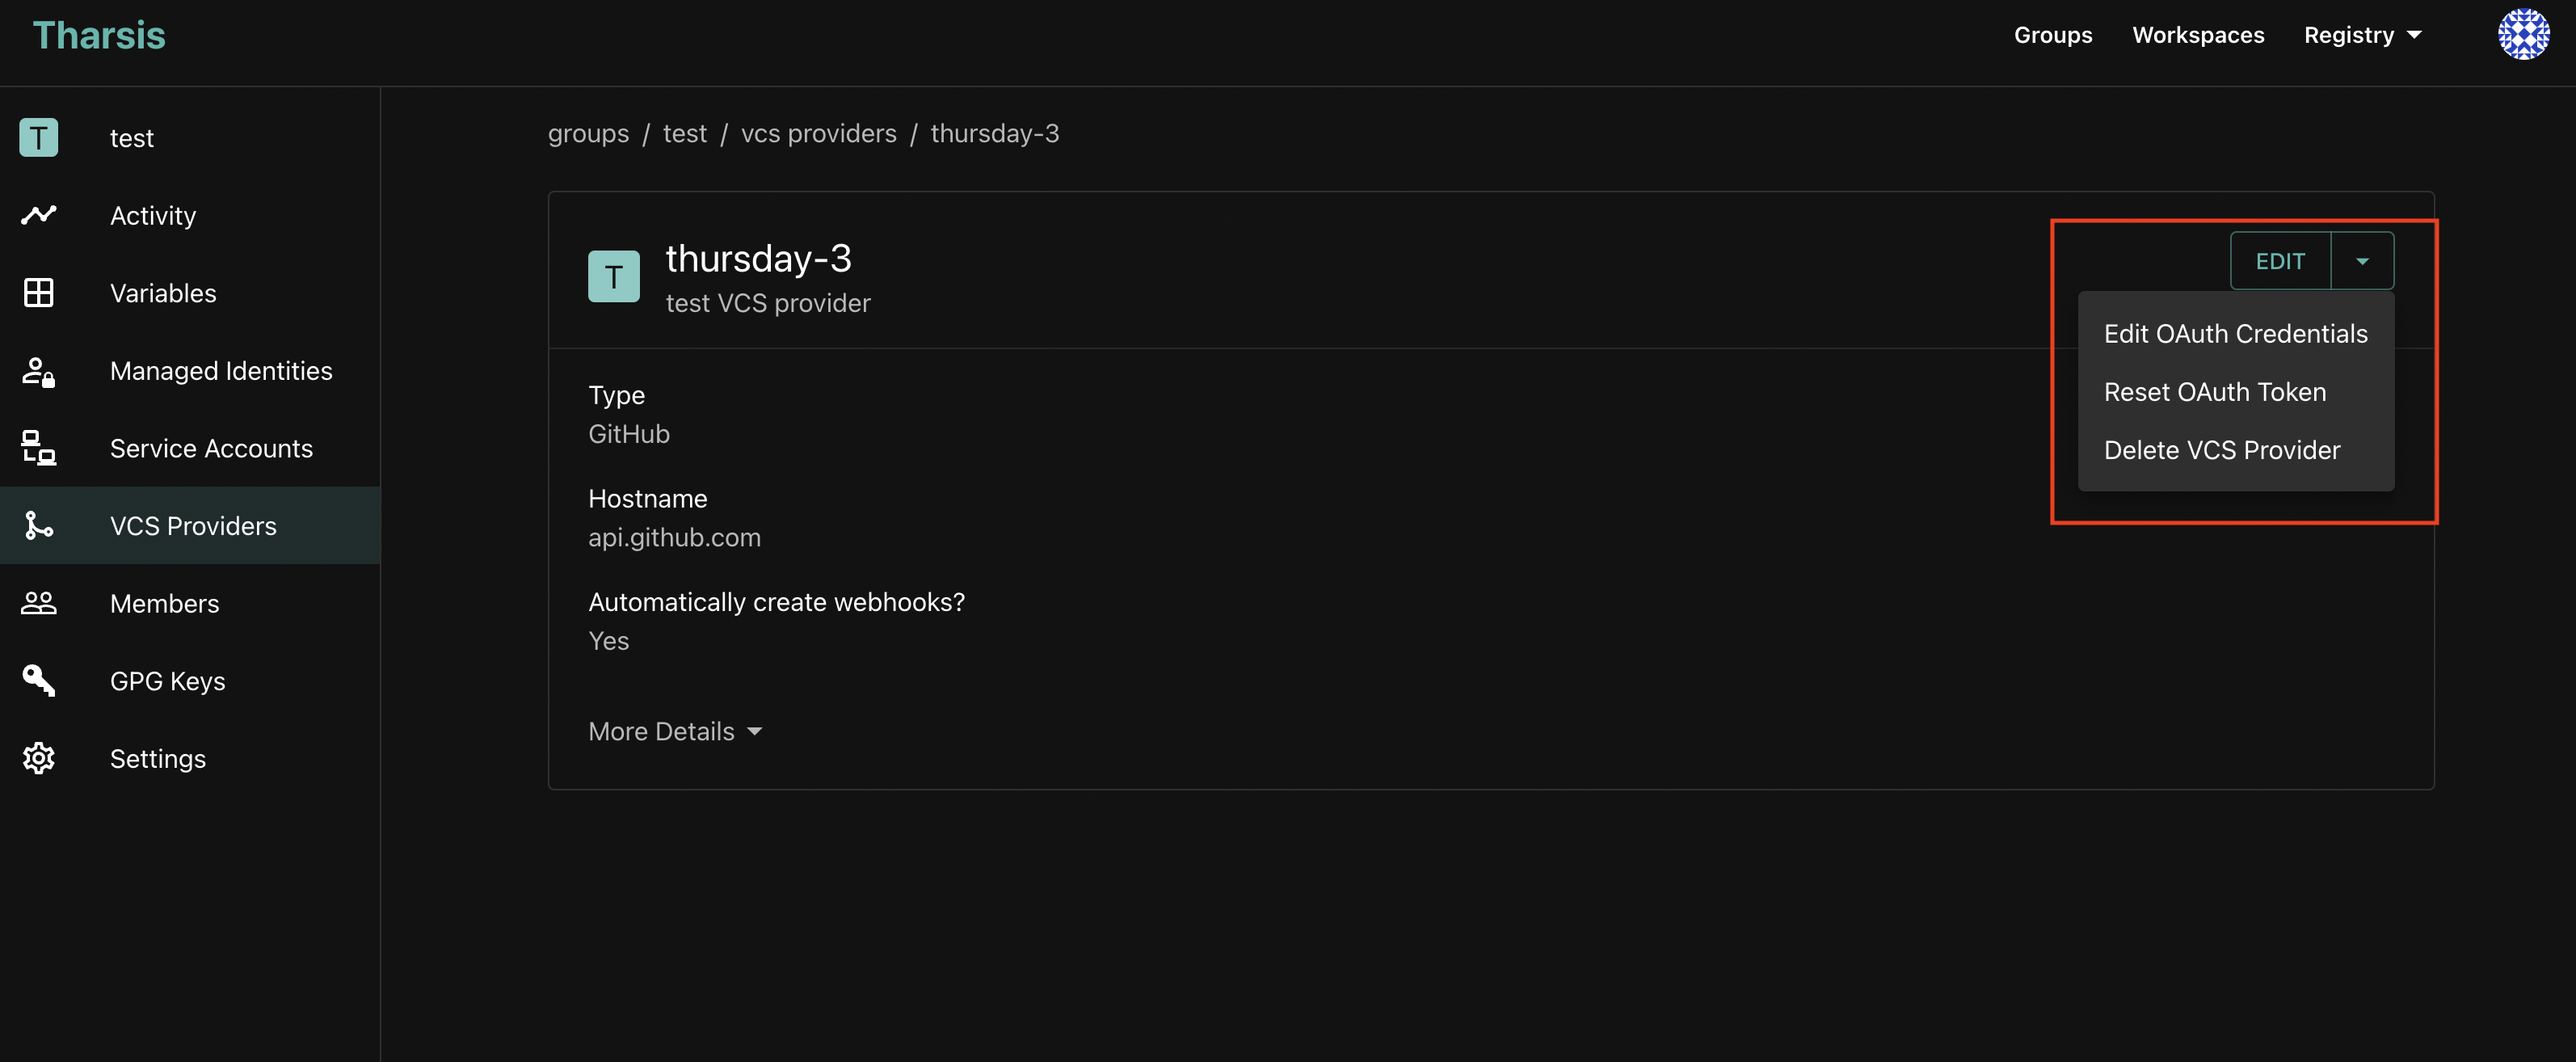
-
Edit
-
When you select
EDIT, you will navigate to a page where you can update the description.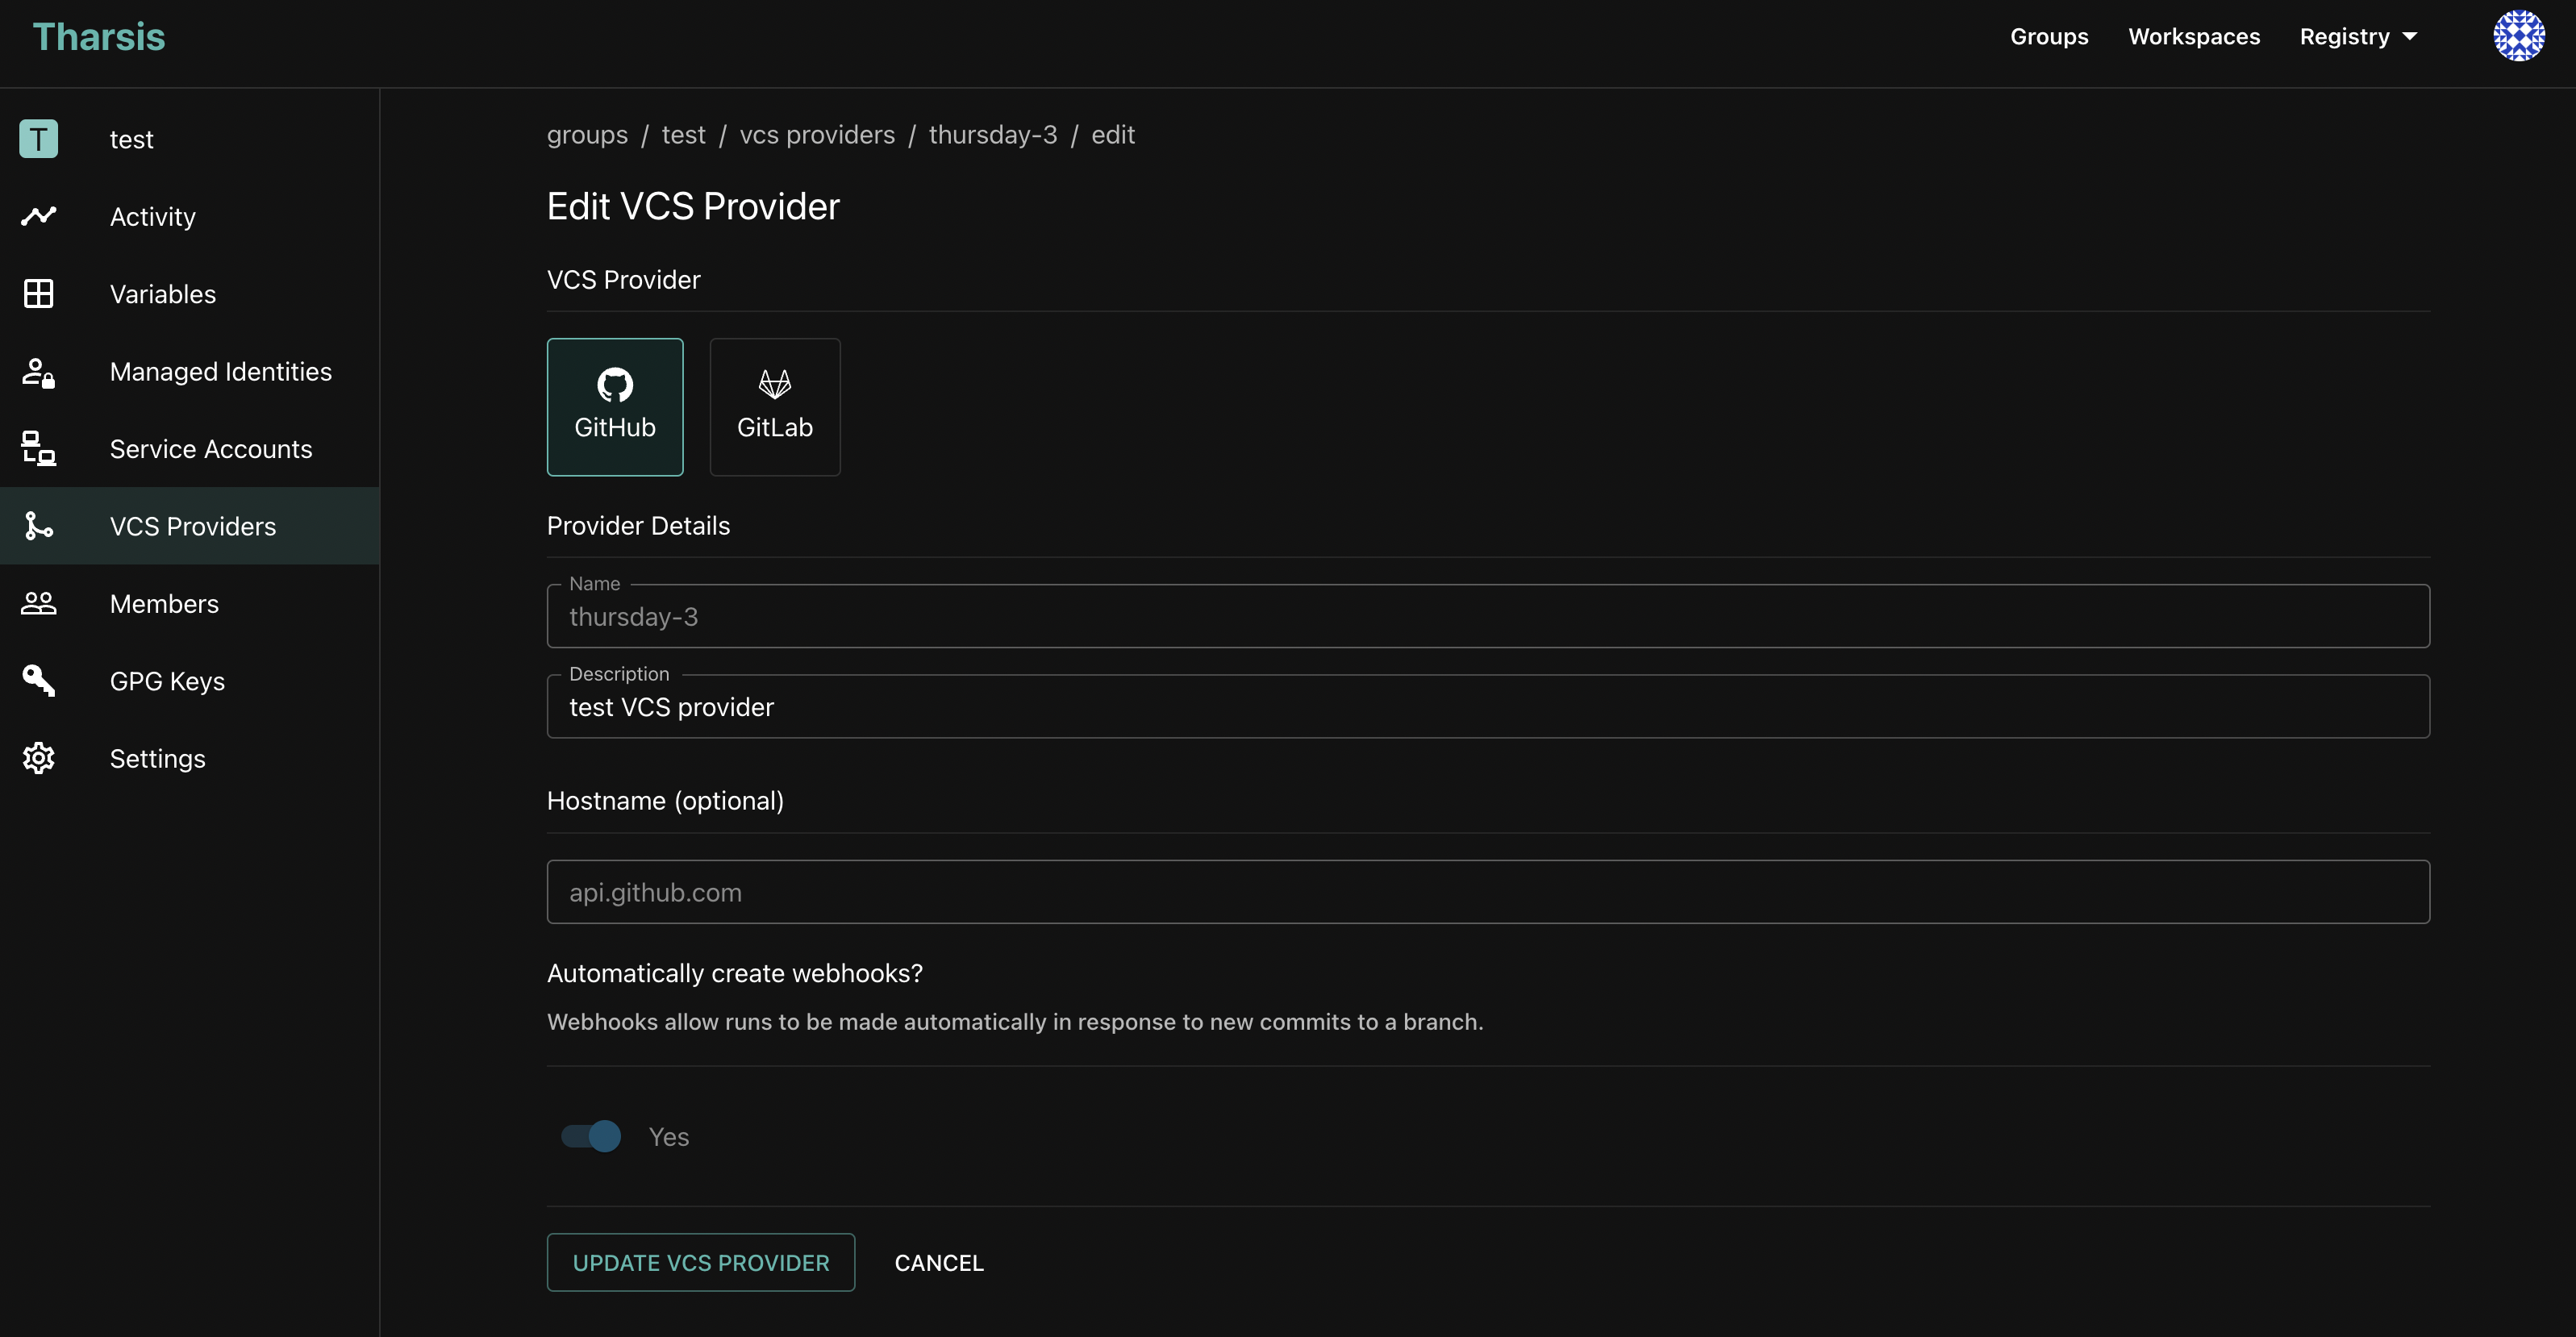
-
-
Edit OAuth Credentials
-
On this page, you can update your OAuth ID and secret value.
-
For security reasons, your OAuth ID and secret value are write-only. The UI will not display these values.
-
After updating your credentials, you may need to reset your OAuth token to confirm your OAuth application is successfully authorized (see below).
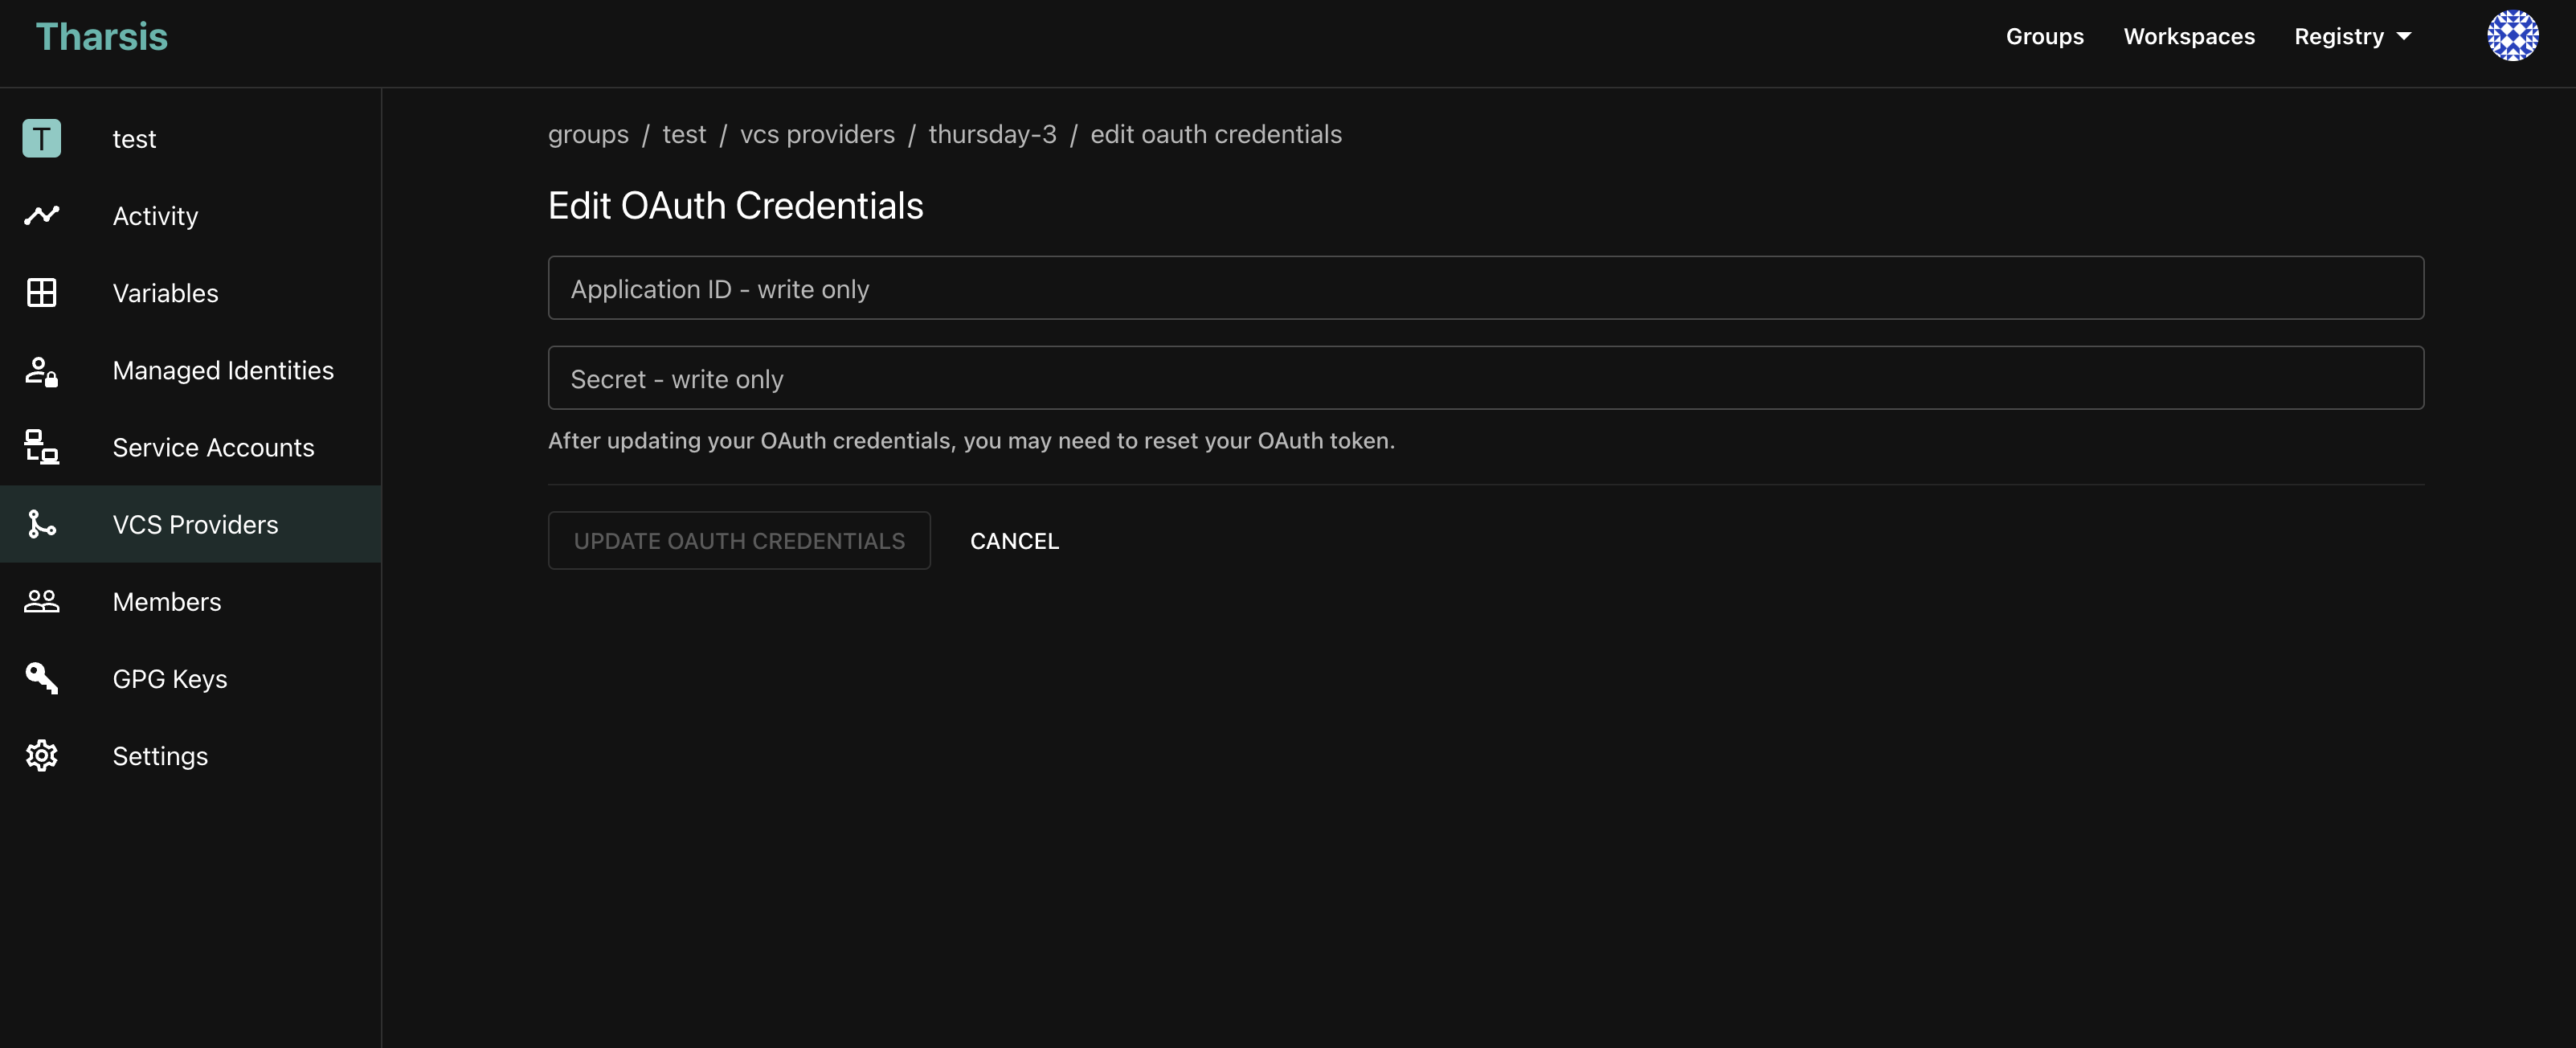
-
-
Reset OAuth Token
-
This option will open a dialog confirmation. When you click on
RESET OAUTH TOKEN, Tharsis will redirect the browser to an approval page where you must reauthorize your VCS provider to use your OAuth application.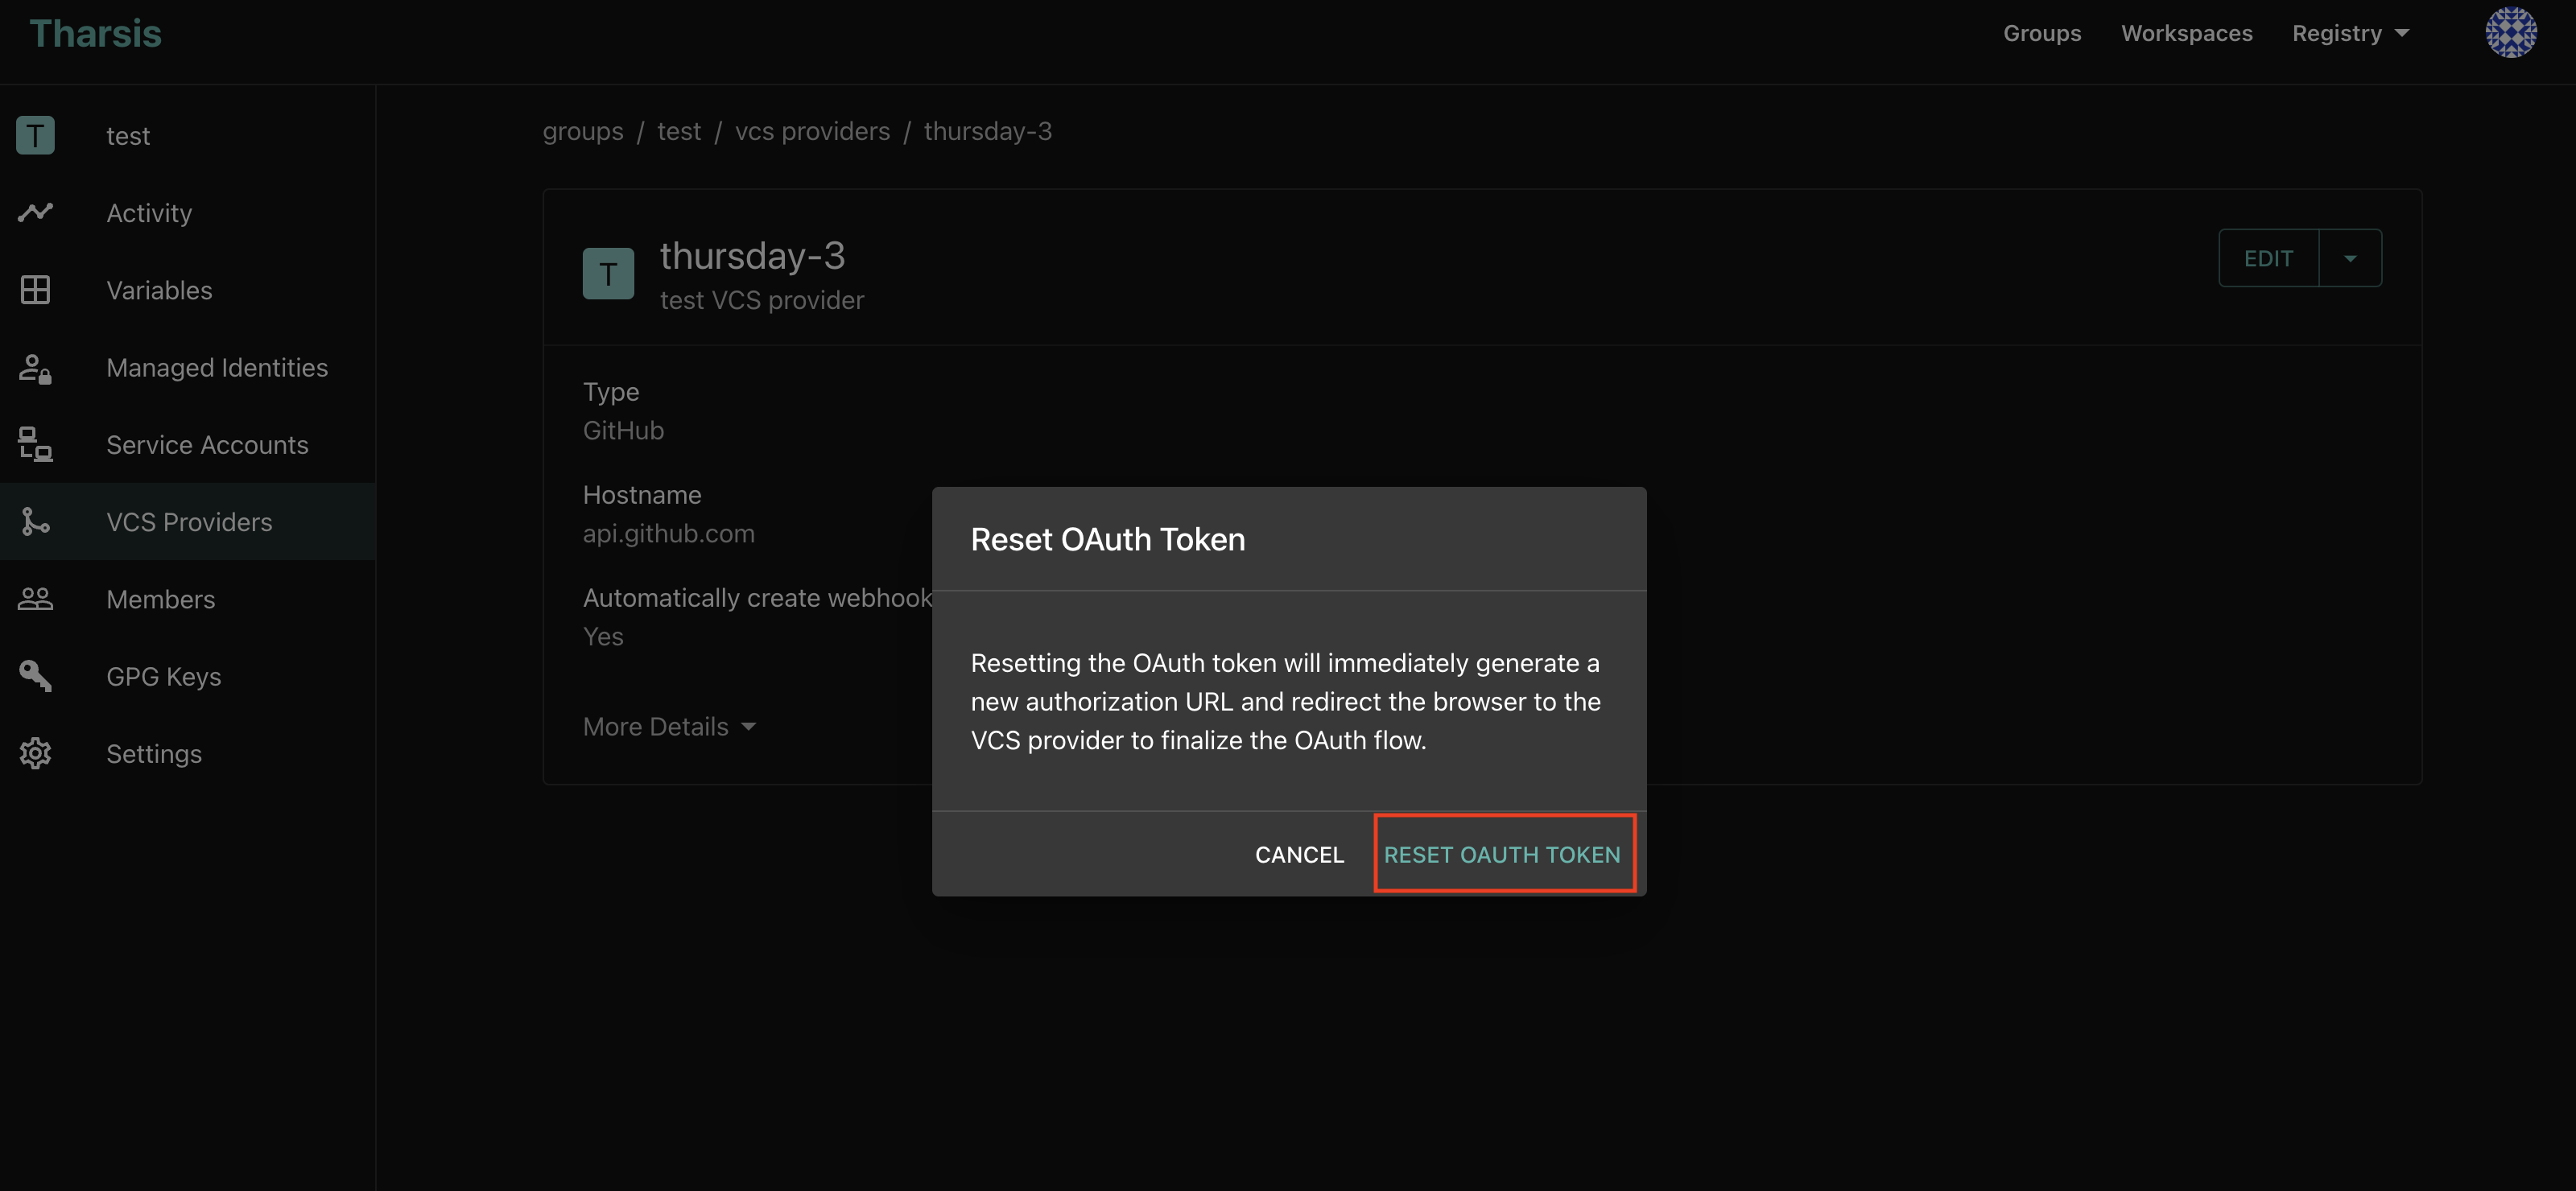
-
Delete a VCS Provider
-
From the VCS provider details page, select ▼ next to
EDIT, thenDelete VCS Provider. -
A confirmation dialog will be generated. To proceed with deletion, click
DELETE.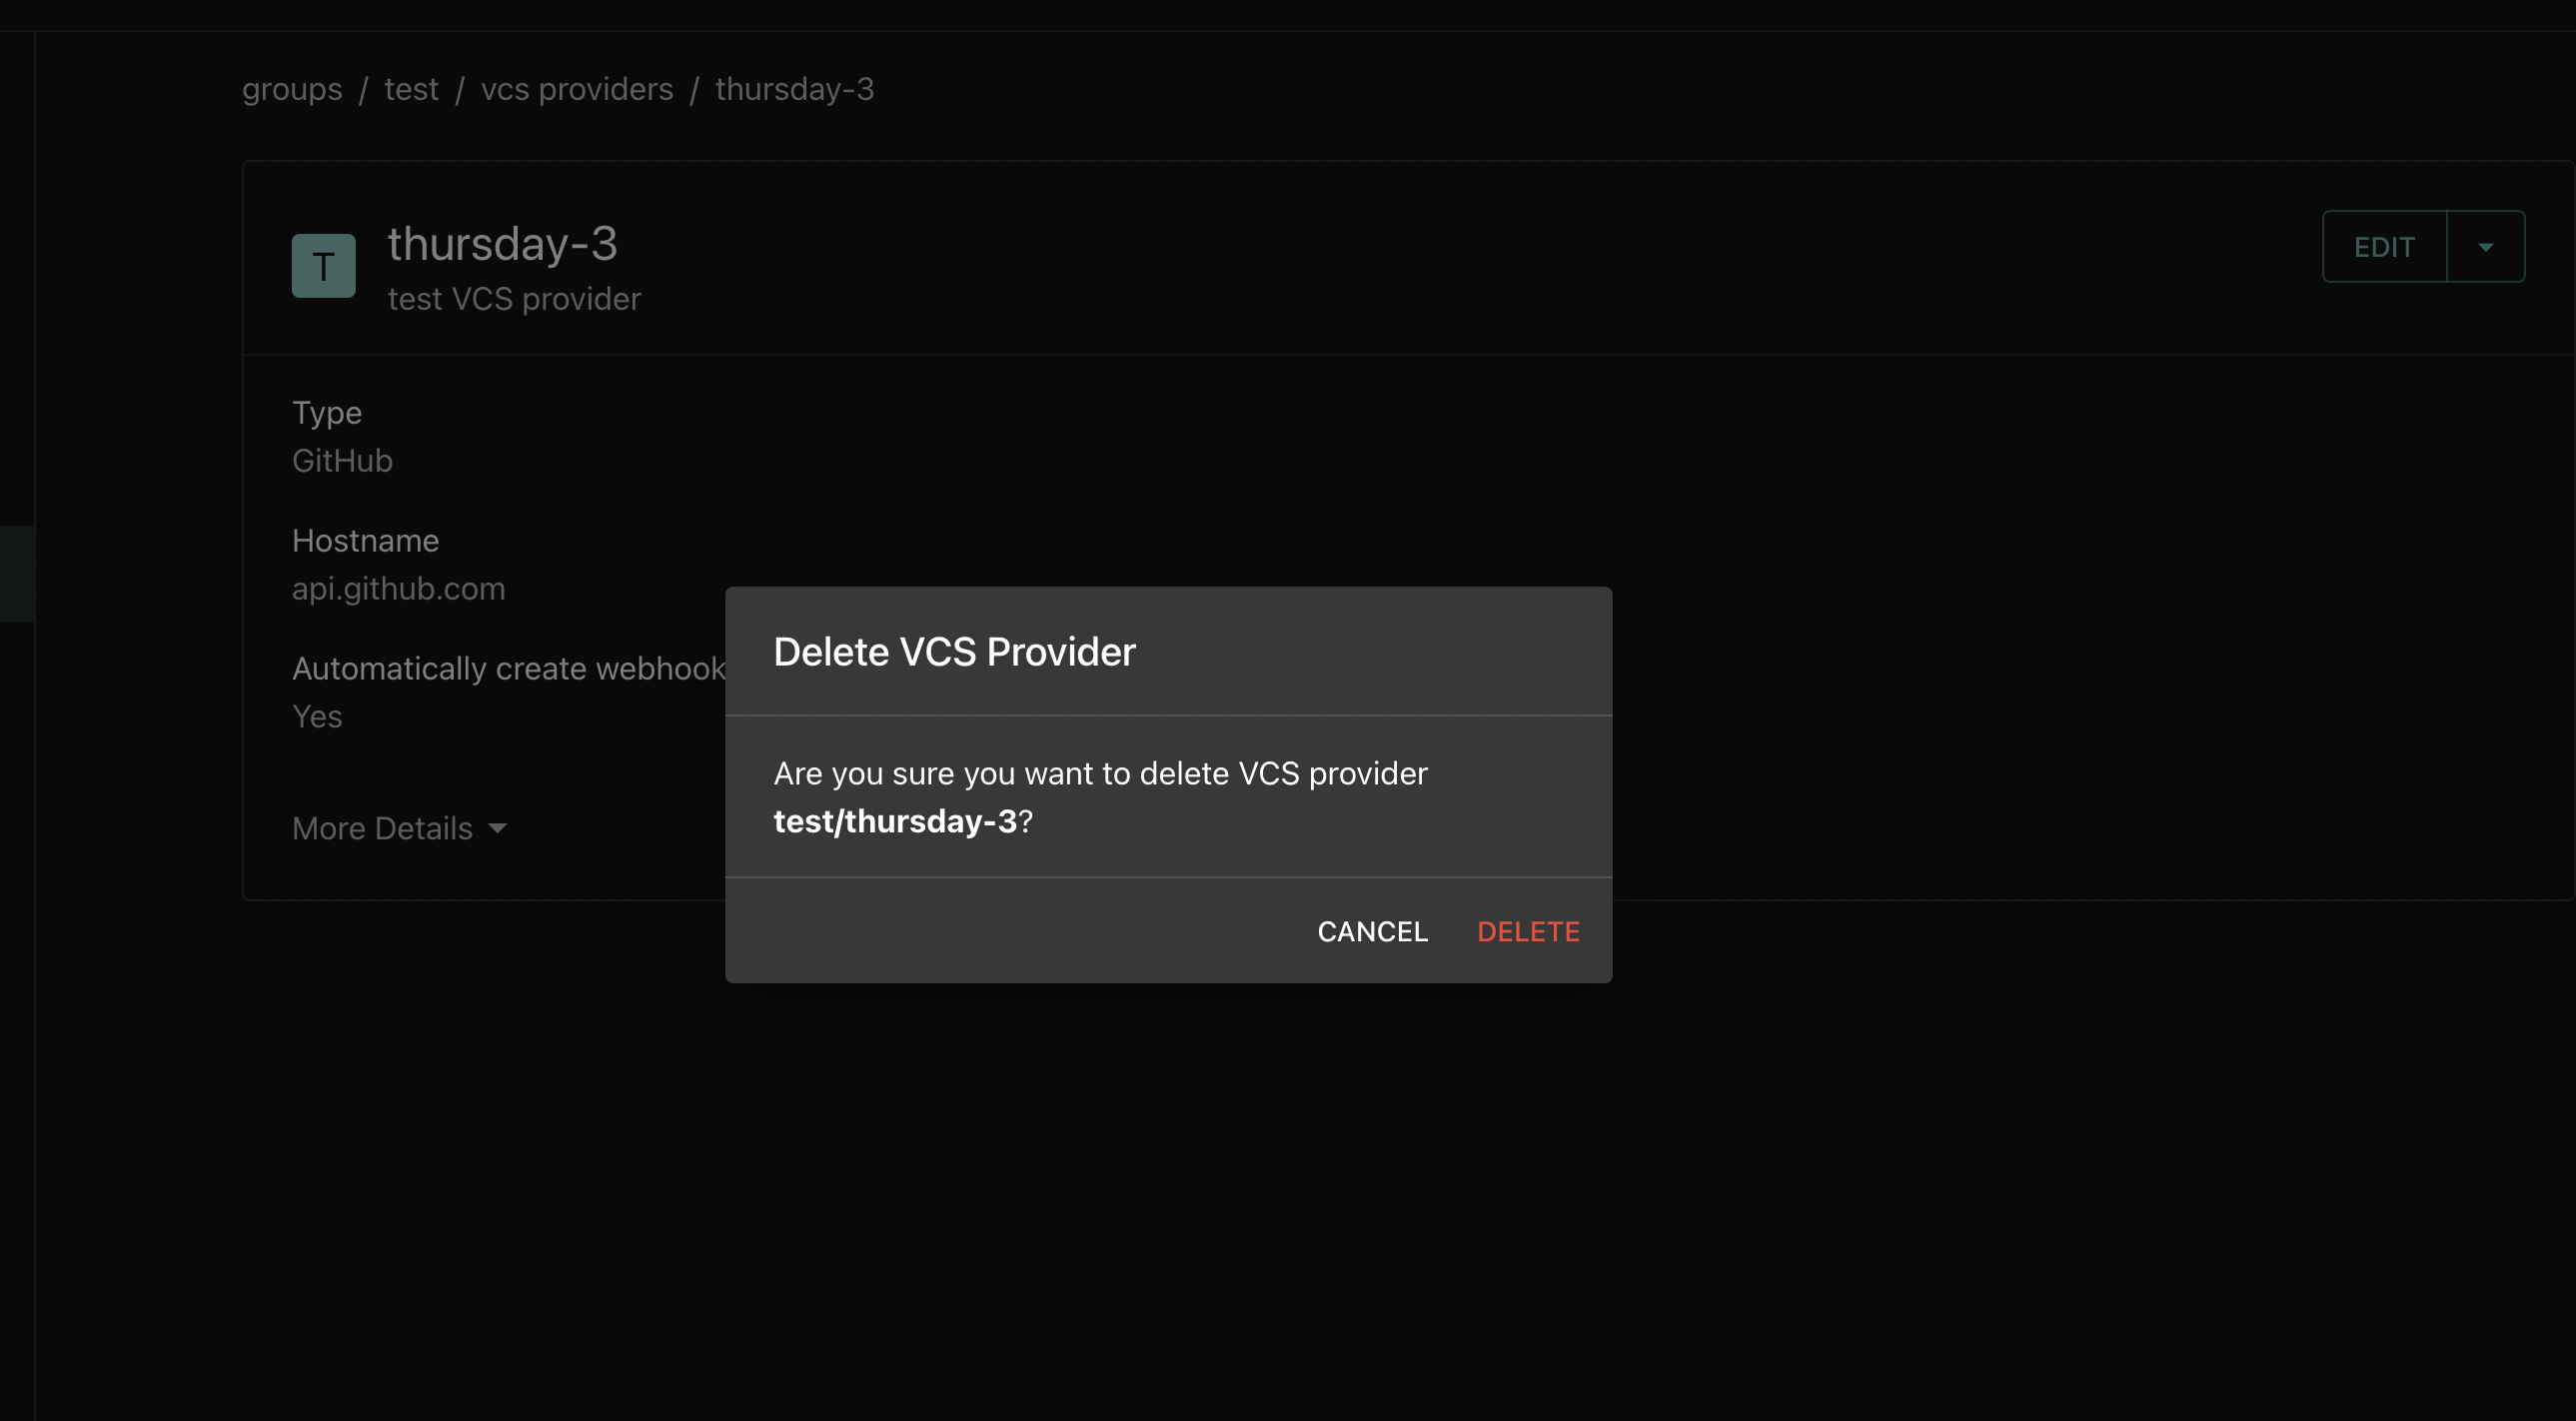 deletion is dangerous
Deleting a VCS provider is an irreversible operation.
Proceed with extreme caution as deletion will sever your connection with your OAuth application. If unsure, do not proceed.
Linking a VCS Provider to a Workspace
When you have a VCS provider that has been successfully authenticated to your OAuth application, you can then connect your provider to a Workspace by creating a Workspace VCS Provider Link.
A workspace can only be linked to one VCS provider.
A VCS provider can be linked to multiple workspaces.
Create a Workspace VCS Provider Link
-
Navigate to the workspace page where the link will be created and select
Settingsfrom the sidebar. Then scroll toVCS Provider Link Settings.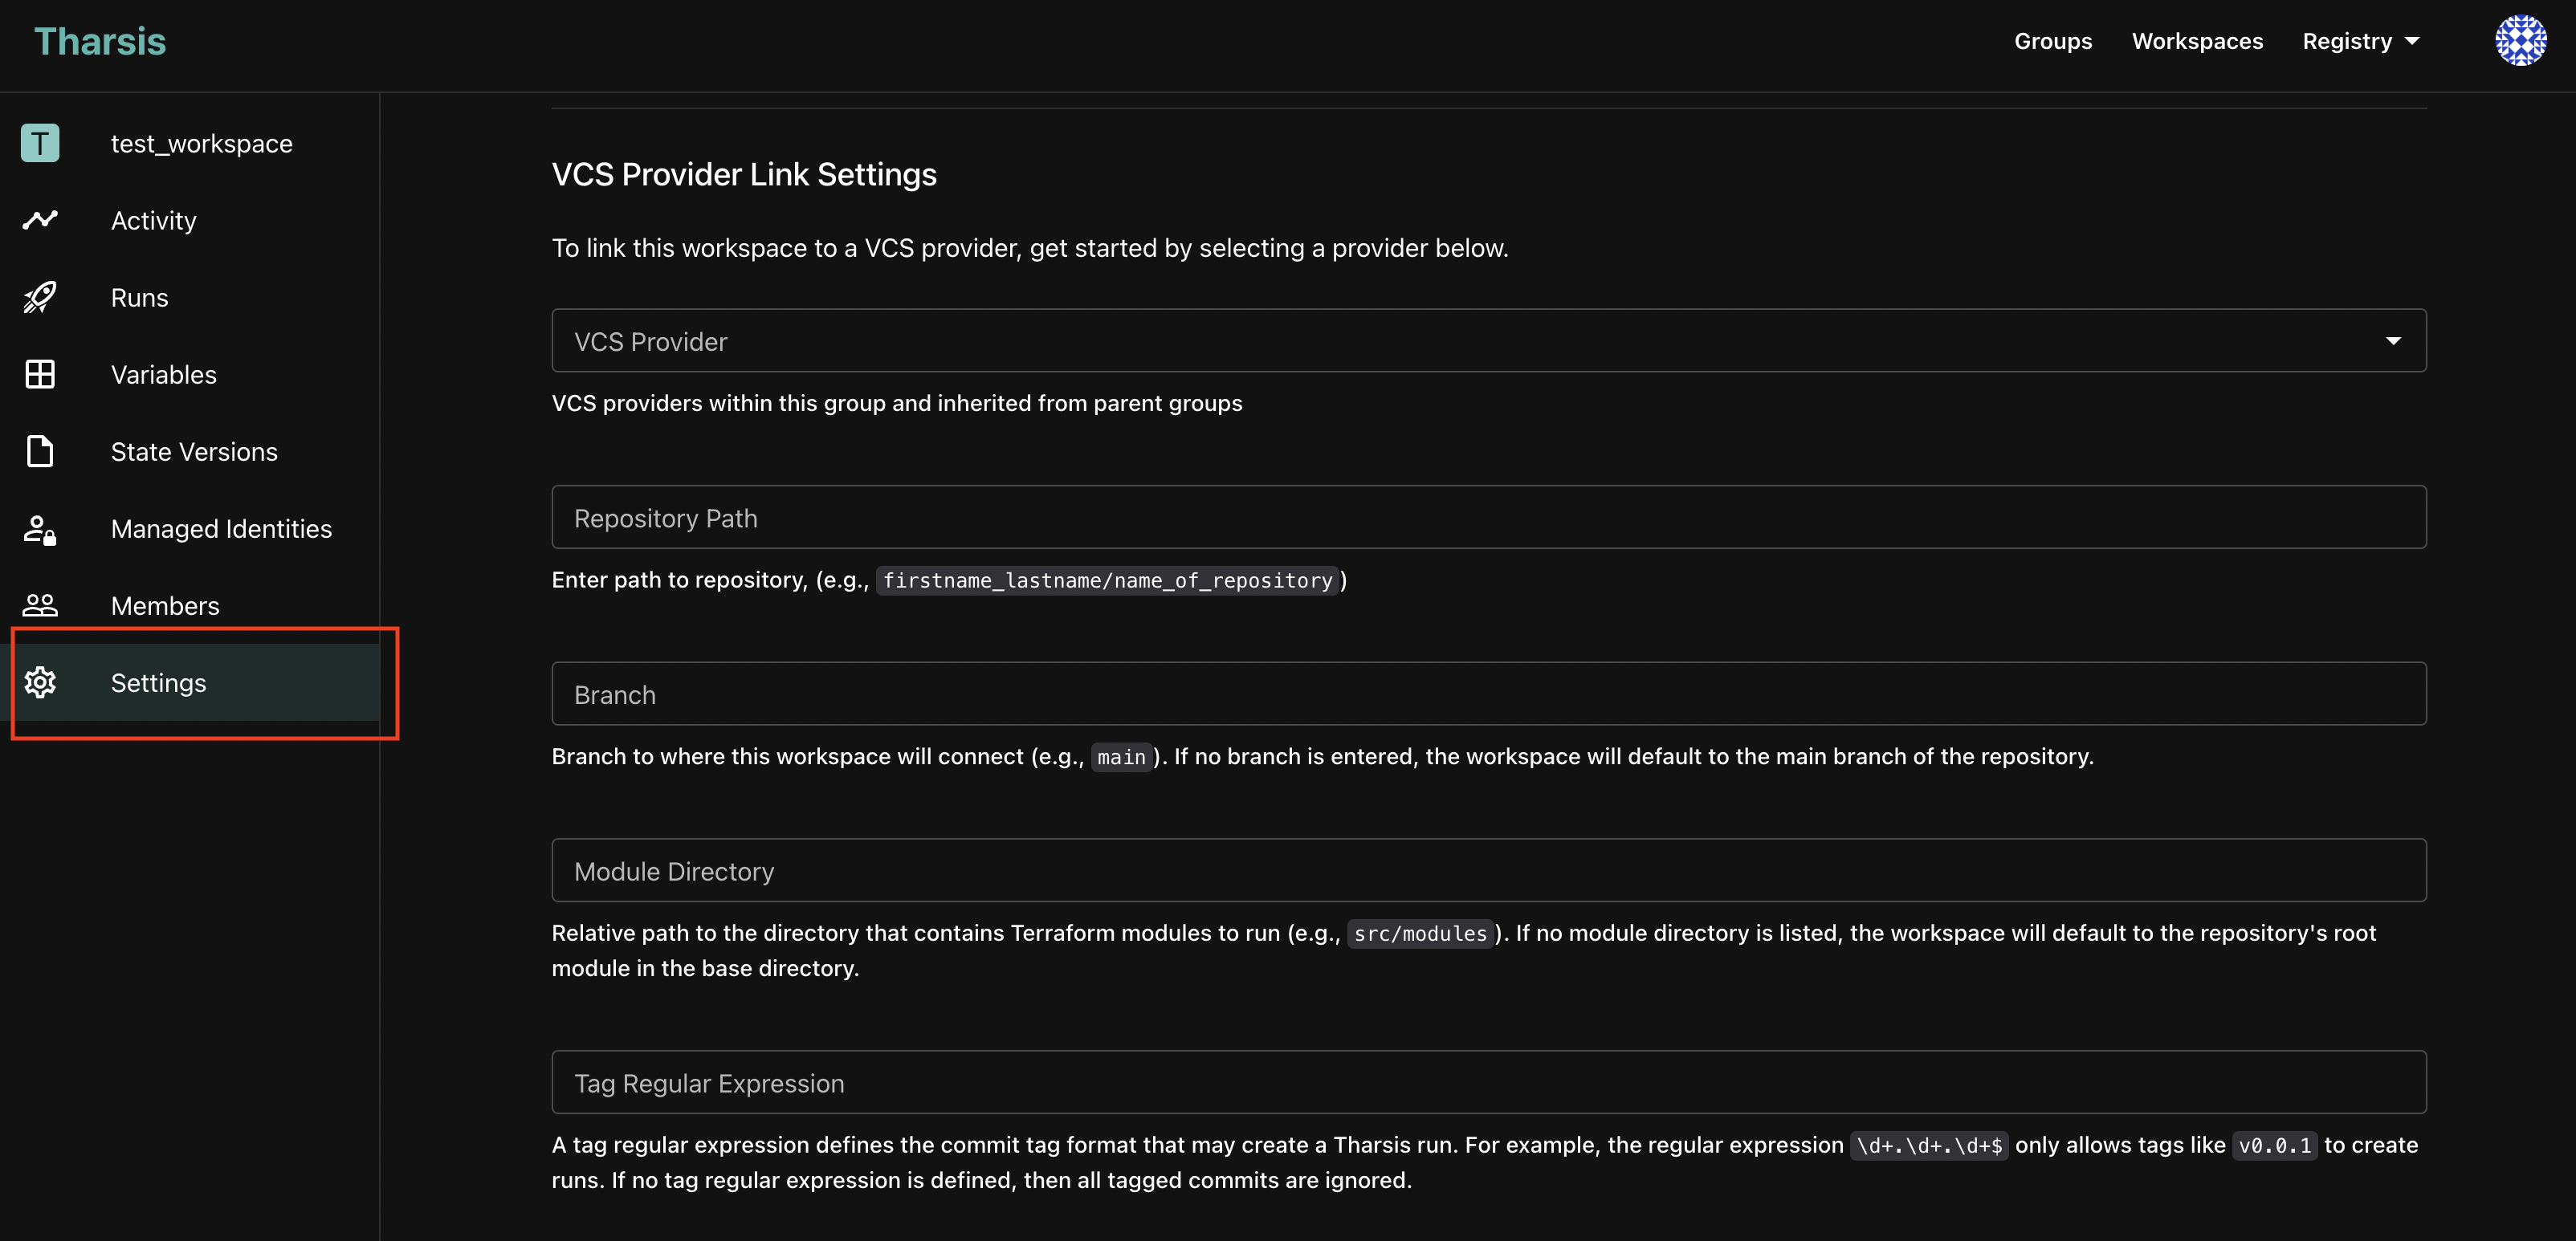
-
Select the VCS provider to connect from the autocomplete.
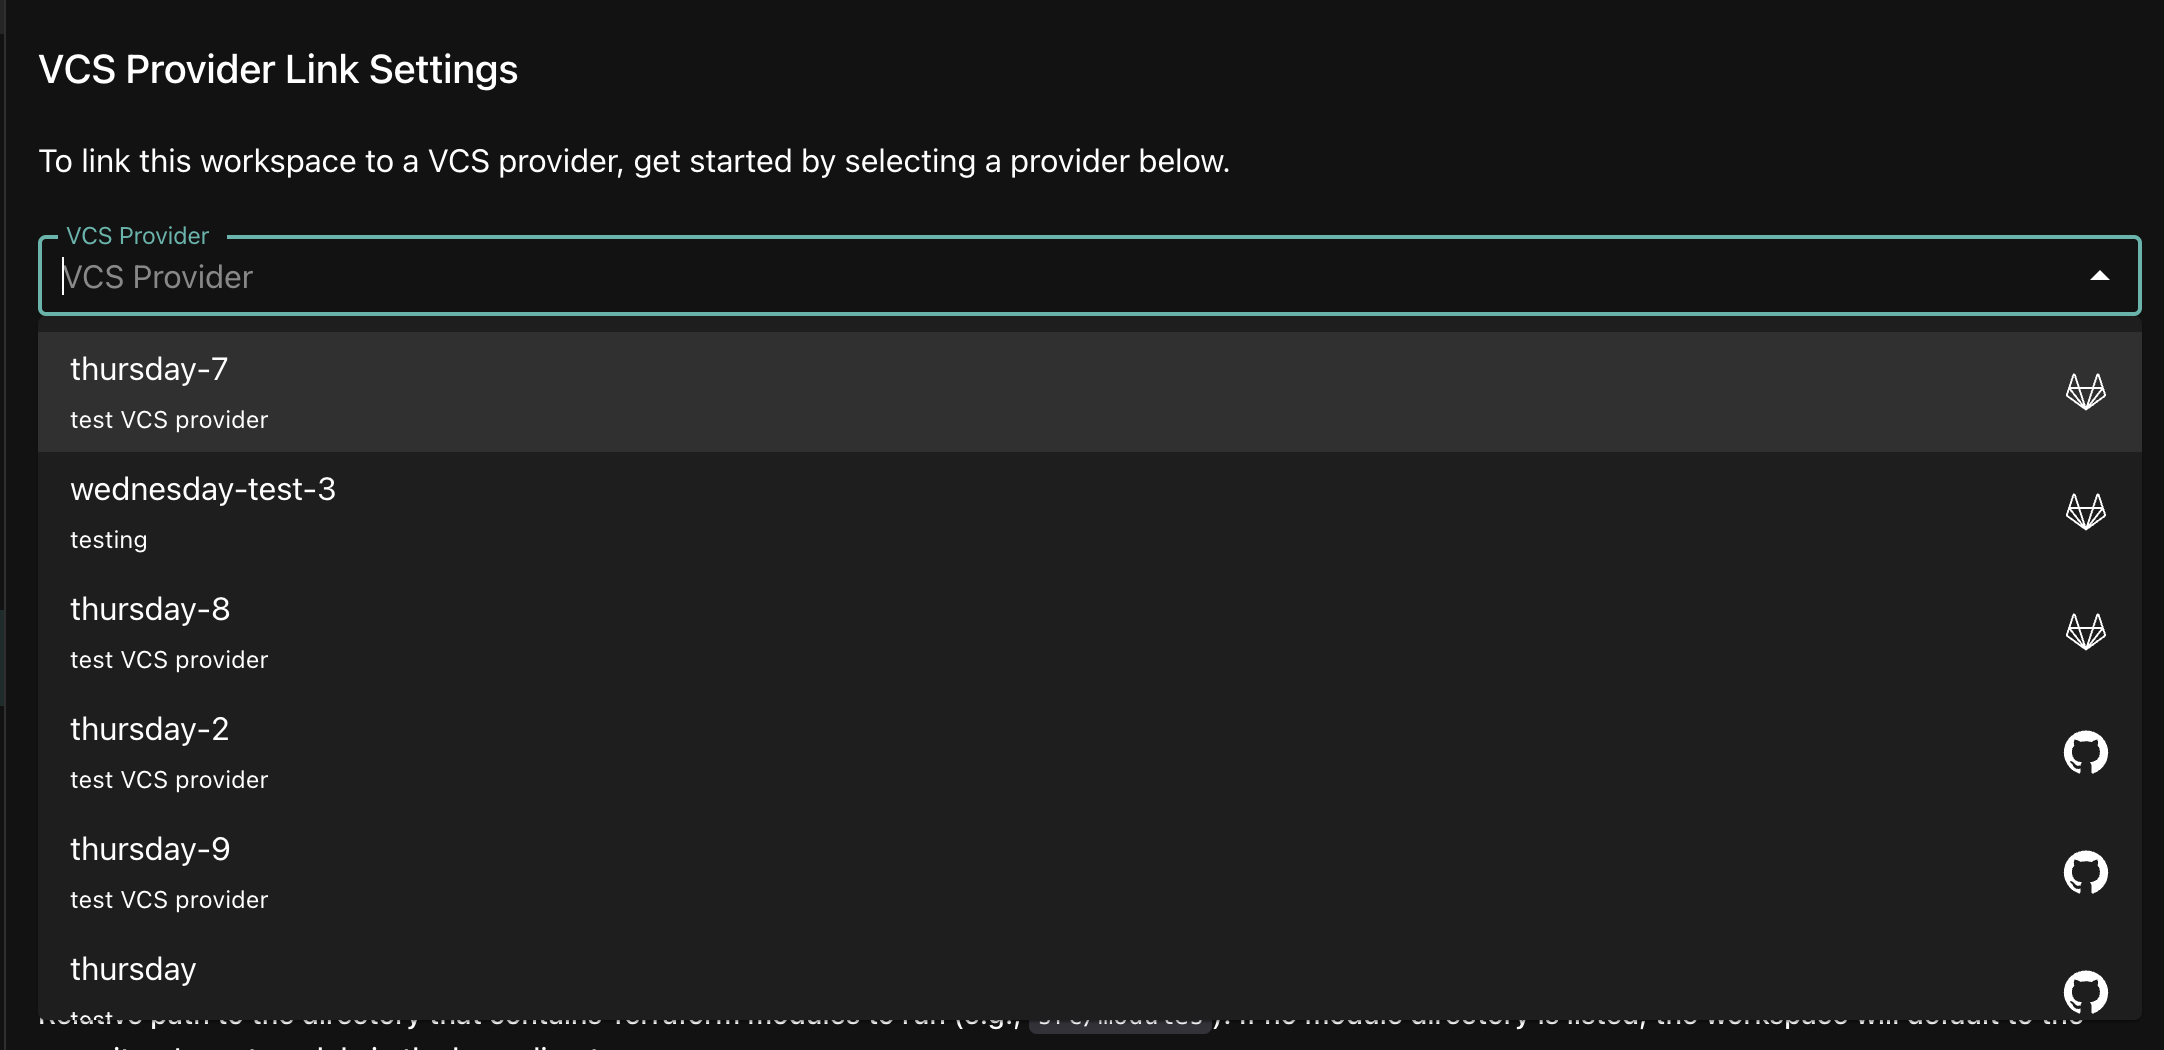 Note
NoteIf you intend to manually configure webhooks, select a VCS provider that has auto complete webhooks set to
Off(see Automatically create webhooks? under Create a VCS Provider). -
Enter the path to the repository to which this workspace will be linked. This repository should be associated with the selected VCS provider.
 Important
Only enter the path to the repository. For example, if the URL to your repository is
https://gitlab.com/username/test-repo, you should only enterusername/test-repo.Also...The VCS provider and the repository path are the only values required to create a workspace VCS provider link. Once the link is created, the repository path cannot be updated. The remaining fields can be set when creating or updating the link.
Branch and Module Directory
-
Enter the name of the branch in the specified repository to where the workspace will connect (e.g.,
main). If no branch is entered, the workspace will default to the main branch of the repository. -
Enter the relative path in your repository to the module directory that contains the Terraform modules to run (e.g.,
src/modules). If no module directory is entered, the workspace will default to the repository's root module in the base directory.
Tag Regular Expression
-
A tag regular expression defines the commit tag format that may create a Tharsis run. For example, the regular expression
\d+.\d+.\d+$only allows tags likev0.0.1to create runs. If no tag regular expression is defined, then all tagged commits are ignored.
Here are examples of regular expressions and corresponding Git tags:
Regular Expression Git Tag Format ^\d+.\d+.\d+$ 0.0.1 ^\d+.\d+.\d+ 0.0.1-beta \d+.\d+.\d+$ v0.0.1 ImportantTag regular expressions are limited to 30 characters in length.
Glob Patterns
-
Glob patterns are triggers for automatic Tharsis runs. When defined, the workspace only creates runs when certain files or directories that have changed in a commit match the glob pattern(s). If any pattern matches, a run will be triggered.
-
For example, if you have the defined glob pattern
*.tf, then Tharsis runs will only be triggered by commits that change files with the.tfextension in the base repository directory. Any changes to files in the base directory that do not have the.tfextension will not run when Git commits are made. -
You can add glob patterns by entering a pattern in the input field and clicking
ADD. This will generate a list of glob patterns that will be associated with you workspace VCS provider link. You can remove glob patterns from your list by clicking on thexnext to each pattern.
Here are some examples of glob patterns:
Glob Pattern Explanation *Wildcard. Matches zero or more characters **Recursively matches zero or more directories under the repository's base directory ?Matches exactly one character *.???Matches every file with a three letter extension in the base directory *.tfMatches every file in the base directory with a .tfextension/sample/**/*Matches every file beneath the sampledirectory/**/main/**/*Matches every file that is beneath a directory named mainImportantGlob patterns are independent of the value specified in the
Module Directory, so runs can be triggered from changes anywhere within the repository.AlsoEach glob pattern is limited to 30 characters in length.
Allow speculative run for pull and merge requests
-
When
On, this allows Tharsis to automatically create speculative plans for any pull or merge requests that are created or updated for the link's configured branch. For example, if the workspace VCS provider link is configured to use the branchmain, any merge or pull requests that are made tomainwill trigger speculative plans within Tharsis.ImportantPull and merge requests outside of the specified repository are ignored. Apply runs are not supported.

Disable webhooks?
-
When
On, all webhook events are ignored. VCS runs can still be created manually (discussed in Manual VCS Runs). By default, this will be set toOff.
-
Click on
SAVE CHANGES.
-
If the creation was successful, the settings page will render the new link and its configurations. The autocomplete textbox will display the name of the VCS provider to which the workspace is linked.
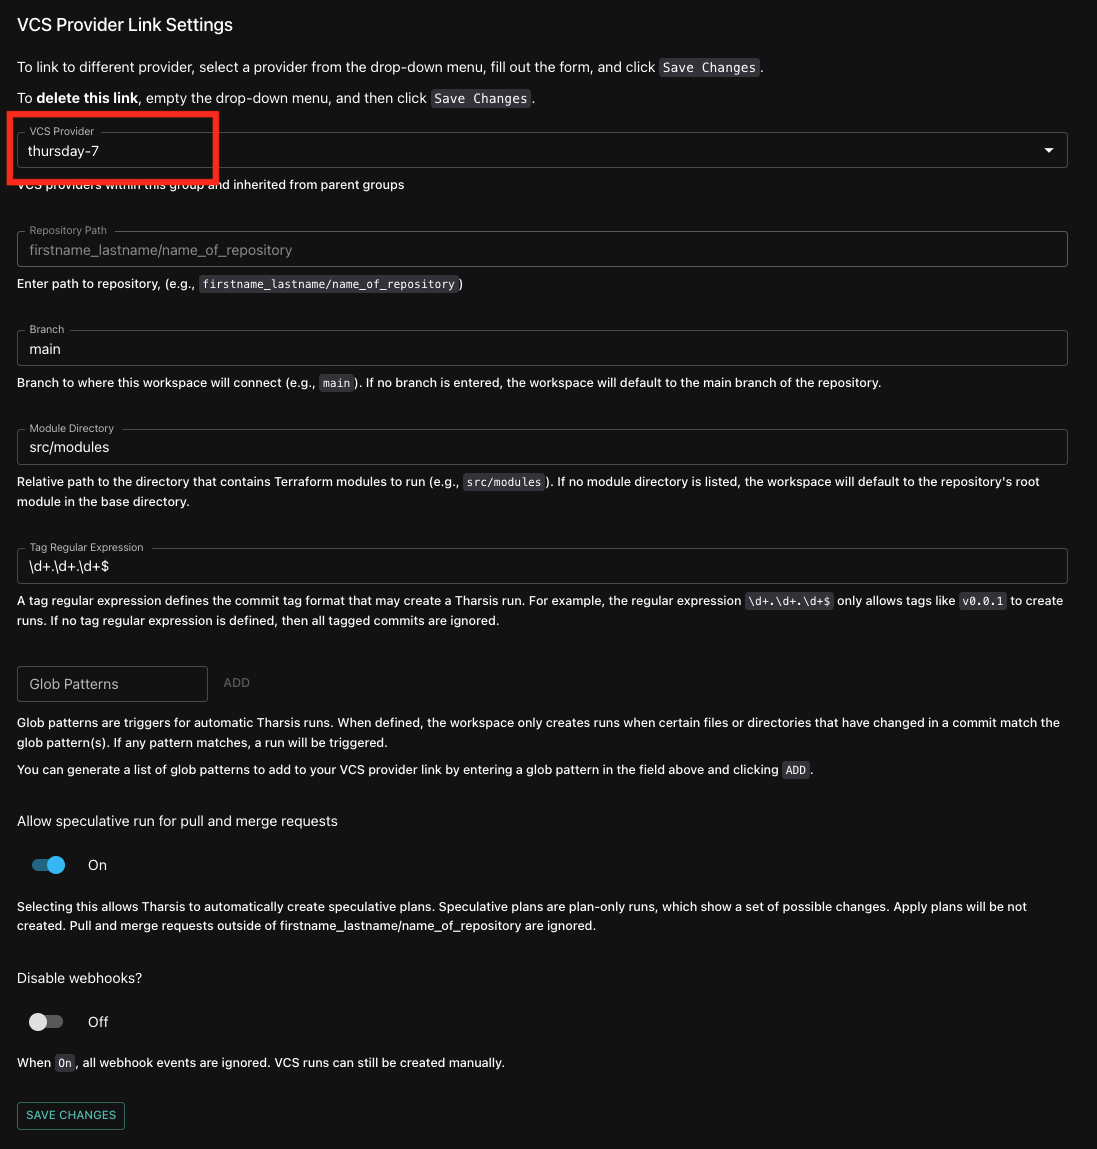
Manually Configuring Webhooks
-
If you create a workspace VCS provider link to a VCS provider that has auto create webhooks set to
Off, then after creating a link, a dialog box will open with values you can use to manually configure webhooks directly within the repository of your provider. Use the provided copy icon to copy the values. -
If your provider is GitLab, the dialog box will generate a URL and token.
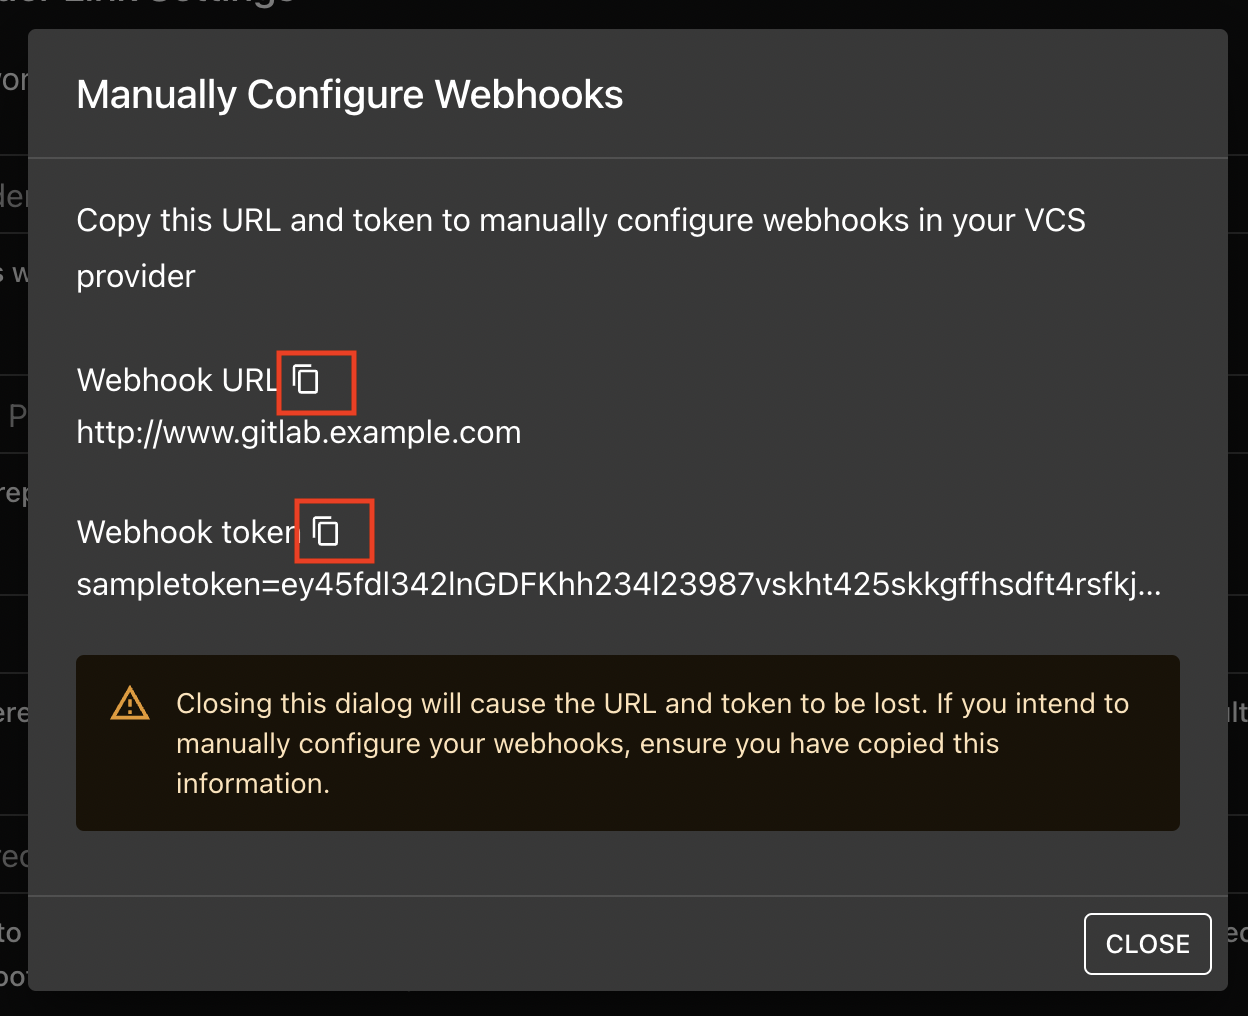
-
If your provider is GitHub, the dialog box will only generate a URL, which has the token configured with the URL.
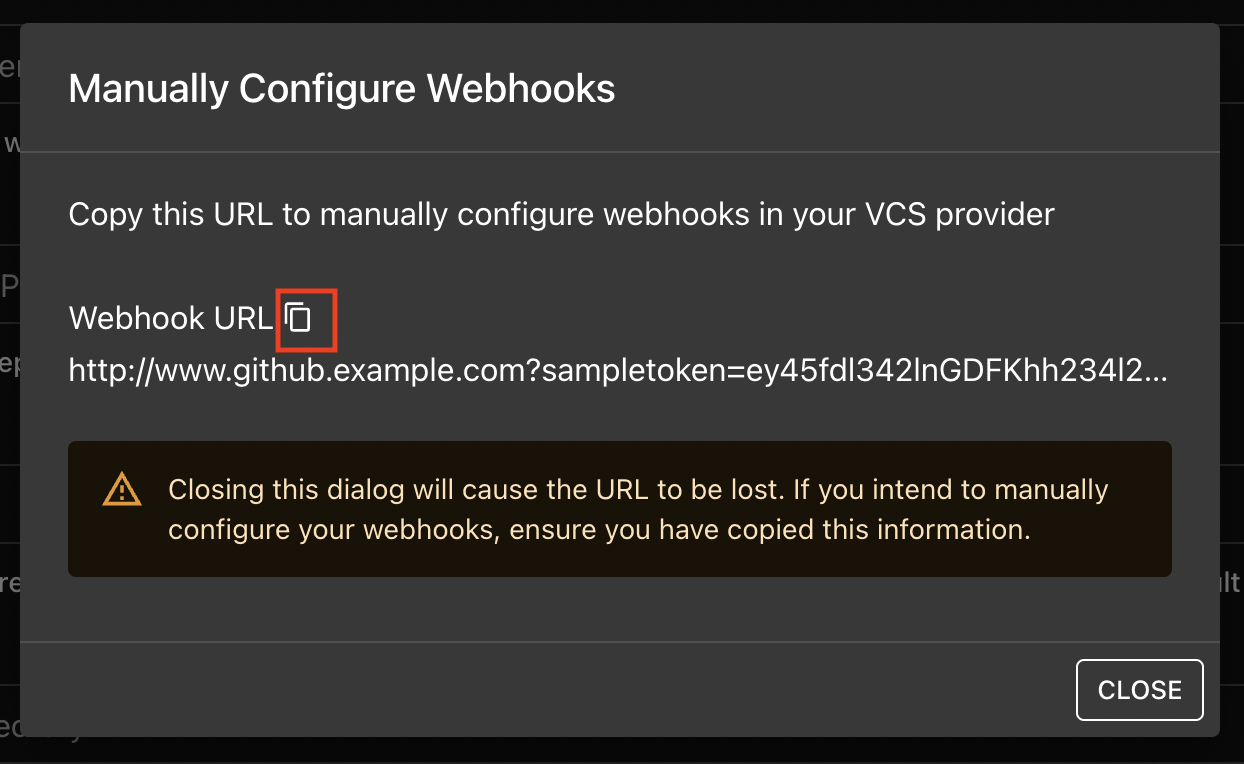 Important
If you intend to manually configure webhooks within the repository of your provider, ensure that you have copied the provided values before you close the dialog box. When the dialog is closed, the values will no longer be accessible.
-
Manually Configuring Webhooks in GitLab
-
Go to the settings of your repository and select
Webhooks. InWebhooks, you can enter the URL and token from the webhooks dialog. Then selectPush events,Tag push events, andMerge request events.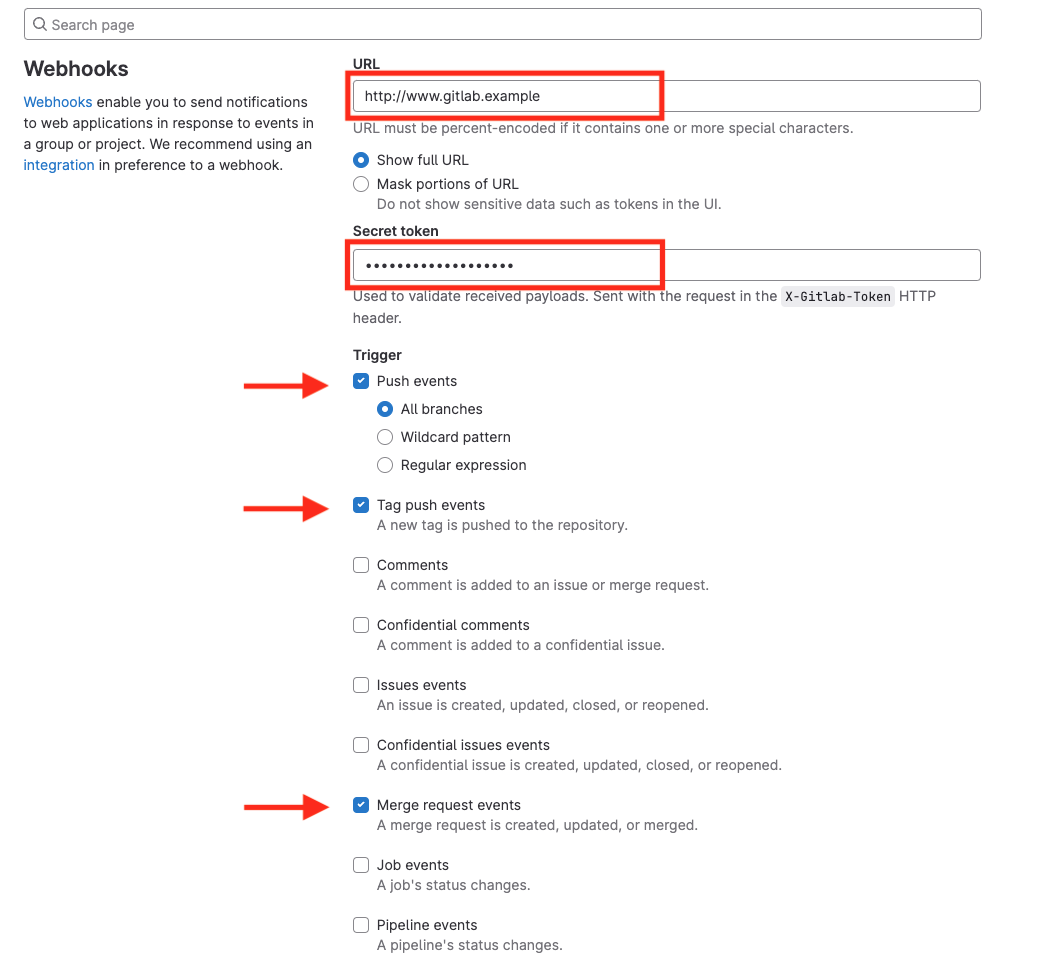
-
-
Manually Configuring Webhooks in GitHub
-
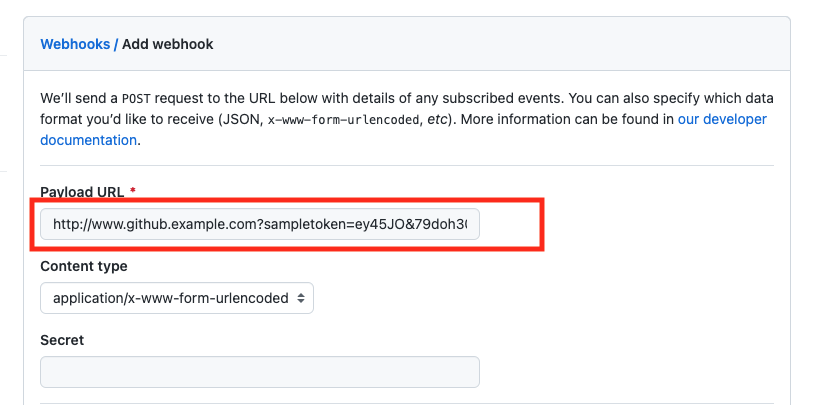
Go to the settings of your repository, select
Webhooks, and then clickAdd webhook.
-
Enter the URL from the webhooks dialog.
-
Select
Let me select individual events.
-
Then scroll down to select the
PushesandPull requests.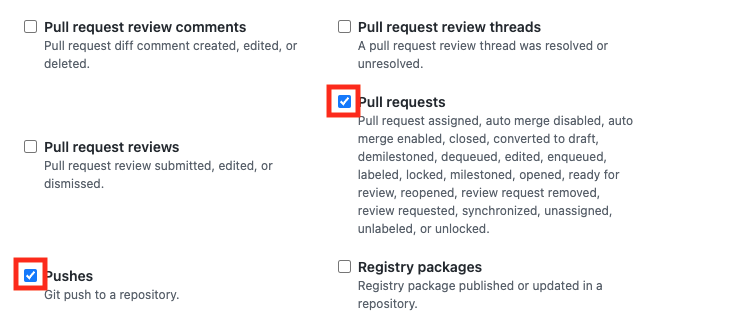
-
Update a Workspace VCS Provider Link
-
Navigate to the workspace page that contains the link and select
Settingsfrom the sidebar. Then scroll toVCS Provider Link Settings. -
Except for the repository path, all the fields can be updated.
-
Click
SAVE CHANGESto save updates to the link.
Linking to Different Provider
-
When you link to a different provider, you delete your current workspace VCS provider link and create a new link. Additionally, any workspace VCS provider link settings you had will be lost and new settings must be configured when setting up your new link.
-
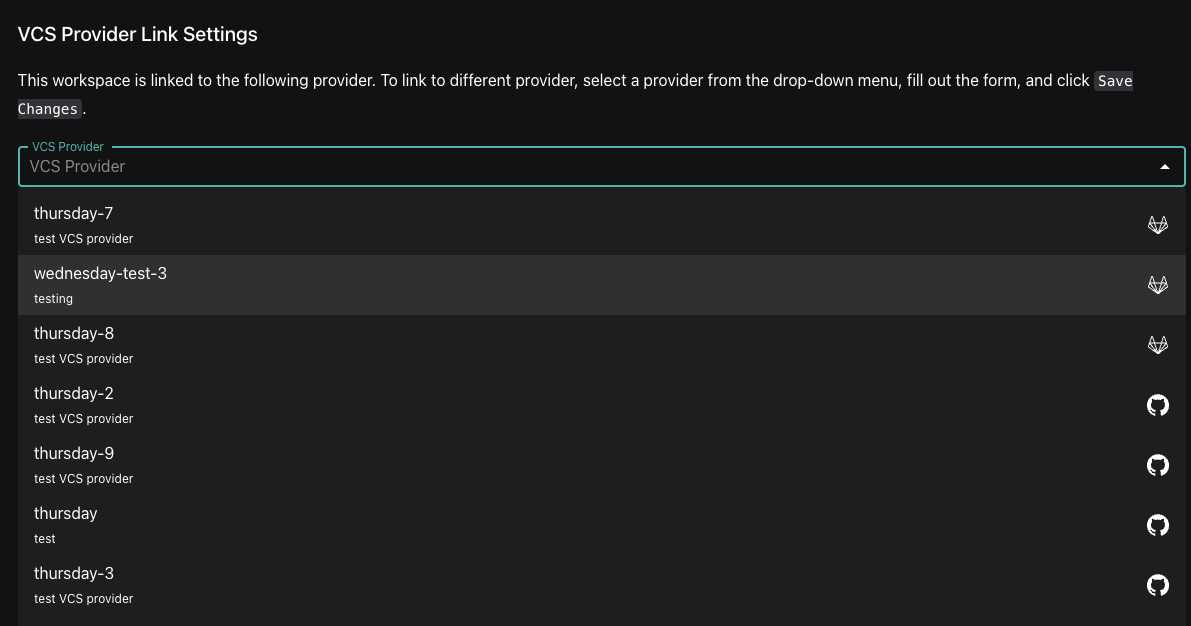
To link to a different provider, select another provider from the autocomplete. When you select a new VCS provider from the menu, the fields below will empty and reset. You can then fill out the form to configure your new link. See Create a Workspace VCS Provider Link.
 Tip
TipSelecting a different provider from the autocomplete will not create a new link nor will it update or delete an existing link. No modifications are made until
SAVE CHANGESis pressed.AlsoWhen you are viewing the details of an existing link, and you select a new VCS provider from the autocomplete, the fields will empty and reset. If you go back and select the linked VCS provider, the fields will repopulate with the current link's settings.
-
Then when you click on
SAVE CHANGES, the link to the former VCS provider will be deleted, and the new link will be created. The name of the VCS provider will be displayed in the autocomplete and the fields will be populated with the configuration details of your new link.
Deleting a Workspace VCS Provider Link
-
To delete your workspace VCS provider link, clear the autocomplete by pressing the
x. This will empty the autocomplete textbox and you should only see theVCS Providerplaceholder. This will also empty and reset all the fields on the form.

-
Then click on
SAVE CHANGESto delete the link. A confirmation snackbar will confirm deletion was successful.
Manual VCS Runs
Manual VCS runs are possible by navigating to the target workspace and selecting Runs tab on the left sidebar. Then click on CREATE RUN and select VCS Workspace Link. Follow the UI's prompts to specify the details of the run to be created.
Frequently asked questions (FAQ)
Why is the link to authorize my OAuth application not working after I have created a VCS provider?
Check that your API URL is valid.
Try updating your OAuth credentials by reobtaining an ID and secret value from your provider. When you have these values, you can Edit OAuth Credentials and then Reset OAuth Token (see Update A VCS Provider).
I have a workspace VCS provider link set up, so why are my Git commits not triggering runs?
Check webhooks
-
Check if you are linked to a VCS provider that has auto create webhooks set to
Off. If set toOff, you can manually set up webhooks within the settings of your repository. Another option is to switch to a VCS provider that has auto create webhooks set toOn. -
Check if your workspace VCS provider link has disable webhooks set to
On. If so, try switching toOff.
Check settings of your workspace VCS provider link
- Confirm that the branch and module directory listed in your link corresponds with the branch and module directory of your repository. Additionally, check your tag regular expression and glob patterns (if any), as they affect how runs are triggered.